Showing posts with label Eco. Show all posts

Wednesday, 12 December 2018

Why are we doing this?

Seasonal salad in December
We're often asked why we have chosen to live the way we live. Occasionally followed by: You're not ill, are you? Or: You have to admit it's kind of weird. We're both well educated and could be working highly paid jobs somewhere, living a 'normal' life.

We don't think it's weird at all. To our way of thinking, it's one of the few sensible things to do in this Anthropocene age: growing food, creating wildlife habitat, reducing consumption and waste. While it seems clear that we need to change our economic model globally - give up the unsustainable economic growth model and embrace a circular, localised economy - and change our diet to local, seasonal, organically grown food, we want to find out what that actually means and whether that is realistically possible. Rather than blocking streets in London, we want to find solutions that could be scaled up. We want to know the answers to questions like:

Food
Our store cupboard 

  1. What can we grow organically where we live?
  2. How does that change throughout the seasons?
  3. What kind of plant-based protein can we grow?
  4. What kind of seed for oil pressing can we grow?
  5. Is it possible to have a balanced, healthy and varied diet on only locally grown food?
  6. How do we save seed from (or otherwise propagate) the plants we like to eat?
  7. How do we best preserve the food that we grow?
  8. How do we feed livestock and pets in a sustainable way?

The answers so far:

  1. We can grow far more than we thought possible, an incredible diversity. Every year the list of what we grow grows longer. If you think you can only grow neeps, tatties and kale in Scotland, think again.
  2. While in the summer we can grow some Mediterranean crops like tomatoes, chillies and cucumbers under cover, our maritime climate also allows us to grow lots of leafy salad crops through the mild winter, both under cover and out in the open. Some crops are available most of the year (like oriental greens, mustard, radish and lettuce) or can be stored to last most of the year (like potatoes, beetroot, broad beans and onions), while some have a short season (most of the fruit, though they can also be frozen or dried for use during the winter).
  3. Protein crops: Not very many. Beans, peas and quinoa, that's pretty much it.
  4. Oil seed: Still working on that one. So far only oil pumpkins have produced a reasonable yield, but we're trying linseed and camelina this year.
  5. Varied diet: Oh yes! We have never eaten so well and had such a diverse diet as now.
  6. Seed saving: We're on a major seed saving drive. It's a lot of knowledge and skill to propagate plants and save seed, but luckily there are good books out there. Let's hang on to these important skills!
  7. Storing food: Basically preserve your produce in ways that you like to eat. In our case, this involves a lot of fermentation (kimchi), drying (fruit leathers, herbs for the winter), pickling, making jams/jellies/chutneys/relishes, lots of ice cream and, of course, booze.
  8. Fodder: We're trying to cut out soy and other imported food stuffs from our animals' food. This involves sprouting/fermenting grains for the chickens and cooking up crops like oil pumpkin and tiny tubers (Jerusalem artichokes, potatoes) for them. For the cats, this means feeding some fresh meat (usually rabbit, venison or pheasant roadkill) and sourcing soy-free British-made pet food.

Cleaning and waste
Soapwort dish soap

  1. What alternatives are there to chemical cleaners, soaps and toiletries?
  2. Can we make our own cleaning agents, soaps and toiletries from plants we grow in the garden?
  3. Can we hot compost human manure and safely use the resulting compost?
  4. Is there anything organic we can't compost?
  5. How can we cut out single use plastic from our lives?
  6. How can we reuse materials we already have?

The answers so far:

  1. Cleaning agents: There are some. We are now mainly using vinegar and bicarbonate for cleaning the bathroom and floors and soapwort liquid for doing the dishes. Soapwort is a plant we can easily grow lots of and we're planning to use it for washing our clothes and our bodies in the near future. That's natural saponin. For our hair, we've been using rye flour as shampoo for several years now and it's better than any shampoo we've ever used, especially mixed in herbal infusions of garden herbs and flowers. We make a tooth powder of salt, betonite clay and dried powdered fennel. The remainder of our toiletries are homemade products: lip balm, skin lotion/ointment and sun screen. All use bees wax and herb-infused oils. For our baths, we run the water through a mesh bag containing herbs and flowers.
  2. Home grown herbals: We use soapwort, calendula, comfrey, broad-leaf plantain, rosemary, lavender, rose petals, mint, lemon balm, chamomile etc.
  3. Humanure composting: It works well. Why would we contaminate our waters rather than using our manure as a resource?
  4. Non-compostibles: Not much, if we use thermophilic composting.
  5. Plastic reduction: Probably the easiest way is not to buy so much and to avoid shopping at supermarkets. Small businesses and shops are usually miles ahead when it comes to biodegradable packaging or reuse of containers. Growing and making things cuts out the most, of course, but you can also buy from farm shops or have a veggie box delivered to avoid packaging.
  6. Reuse: We're always working with reclaimed materials, especially wood and fabrics, but also things like metal fittings and glassware.  Rags from old T-shirts make great wet wipes, for example (boil wash after use). It's all about being flexible and thinking first about the alternative designs for a job rather than going with the same old.

Our PV array

Energy

  1. Is it possible in a domestic setting to live on solar panels and battery in Scotland?
  2. What habits do we need to change to live within the energy we generate?
  3. How can we lower our energy use to the bare minimum while still keeping warm, having hot water and food and light during the hours of darkness?

The answers so far:

  1. Solar energy: Yes, if you have an alternative source of heating for the winter, like a wood burner. But only if you really really reduce your electricity usage.
  2. Habits changed: Lots, especially when, how often and how we shower and when we run our appliances.
  3. Energy saving: Lots of ways. Using wash cloths or bucket and scoop instead of having a shower or bath, for example. Not washing clothes (other than underwear and socks) after one use only. Switching to all LED lights and A+++ appliances. Sweeping rather than hoovering. Using hand tools rather than power tools. Putting on extra layers rather than heating the whole house. Keeping the bedrooms at a lower temperature. And so on.

Fauna and flora
Wildflower bed

  1. What habitat can we create?
  2. What plants should we plant specifically to help local wildlife?
  3. If we plant hedges, trees and wild flowers and make wildlife ponds, will animal numbers and diversity increase?

The answers so far:

  1. Let's give over some of our land to wildlife habitat. This can take many forms: wildlife-friendly hedges and trees (like willows), wildlife ponds, wildflower meadows, 'untidy' areas with lots of herbs and flowers.
  2. Selecting plants: Do some research to see which plants your local butterflies require for food, for example. Planting early- and late-flowering plants is a good policy, letting things go to seed also provides a lot of food for wildlife.
  3. If we build it, will they come? Yes, they will! Our garden is buzzing, chirping and ribbeting. After dark in the summer it's hard not to step on a frog or toad. Newts, frogs, toads, dragonflies and damselflies have moved into our pond since we re-established it. Bird numbers have risen dramatically since our hedges filled in. Bumblebees, hoverflies, solitary bees, butterflies and moths are enjoying the many herbs and flowers.

All these things are achievable at the level of private individuals. We don't have to wait for governments and industries to get their act together (by which time it'll probably be too late anyway). If enough of us take these simple steps, the benefits will be realised by all.

Monday, 18 June 2018

Making herb beers

Cheers!
Recently while perusing the fascinating A Modern Herbal by M. Grieve, from 1931, I came across the following paragraph under 'Nettles':
'The Nettle Beer made by cottagers is often given to their old folk as a remedy for gouty and rheumatic pains, but apart from this purpose it forms a pleasant drink. It may be made as follows: Take 2 gallons of cold water and a good pailful of washed young Nettle tops, add 3 or 4 large handfuls of Dandelion, the same of Clivers (Goosegrass) and 2oz. of bruised whole ginger. Boil gently for 40 minutes, then strain and stir in 2 teacupsful of brown sugar. When lukewarm place on the top a slice of toasted bread, spread with 1oz. of compressed yeast, stirred until liquid with a teaspoon of sugar. Keep it fairly warm for 6 or 7 hours, then remove the scum and stir in a tablespoonful of cream of tartar.  Bottle and tie the corks securely. The result is a specially wholesome sort of ginger beer. The juice of 2 lemons may be substituted for the Dandelion and Clivers. Other herbs are often added to Nettles in the making of Herb Beer, such as Burdock, Meadowsweet, Avens Horehound, the combination making a refreshing summer drink.'

Lemon balm
I immediately set to experimenting with that and the result is indeed a very refreshing lightly alcoholic drink. Initially I steamed the herbs, then tried boiling them for 20 minutes but now I infuse them for 24 hours, the same as for elderflower cordial. The results are all very similar. Since the infusion method is easiest and uses least energy, I will stick to using that.

Since we aim to use only local ingredients, I replaced the ginger with lemon balm, which we have aplenty and which gives a nice citrus tang.

Here are a couple of nice & easy recipes to try. No doubt, more variations will follow as more herbs and fruit become available throughout the year.

Spring weed beer

Bottling time
Makes 5 litres

Ingredients
A pillowcase full of nettle tops, dandelion flowers, cleavers (sticky willy) and lemon balm
A handful of wild hops (optional)
500g sugar
1 tsp brewing yeast
1/4 cup sugar for bottling
  1. Pick your ingredients and put them in a large pot.
  2. Cover with boiling water (2-3 litres) and leave to infuse for 24 hours. 
  3. Strain and boil for 5 minutes.
  4. Pour the liquid into a large fermenting bucket with lid, stir in 500g of sugar and top up to the 5-litre mark with cold water (and ice cubes to make it cool faster).
  5. Leave to cool to 25C and add the yeast.
  6. Ferment for a week.
  7. Dissolve 1/4 sugar in 1 cup of warm water and pour into a sterilised demi-john or similar large container. 
  8. Syphon the brew from the fermenting bucket into the demi-john, to get rid of the sediment and mix in the bottling sugar.
  9. Bottle the beer immediately in sterilised bottles and leave to bottle condition for at least five days. 
  10. Serve chilled. 

Elderflower beer

Elderflowers in our hedge
Makes 5 litres

Ingredients
30 elderflower heads
A few sprigs of lemon verbena
500g sugar
1 tsp brewing yeast
1/4 cup sugar for bottling
  1. Pick your ingredients and put them in a large pot.
  2. Cover with boiling water (2-3 litres) and leave to infuse for 24 hours. 
  3. Strain and boil for 5 minutes.
  4. Pour the liquid into a large fermenting bucket with lid, stir in 500g of sugar and top up to the 5-litre mark with cold water (and ice cubes to make it cool faster).
  5. Leave to cool to 25C and add the yeast.
  6. Ferment for a week.
  7. Dissolve 1/4 sugar in 1 cup of warm water and pour into a sterilised demi-john. 
  8. Syphon the brew from the fermenting bucket into the demi-john, to get rid of the sediment and mix in the bottling sugar.
  9. Bottle the beer immediately in sterilised bottles and leave to bottle condition for at least five days. 
  10. Serve chilled, on its own or with a measure of gin and some ice.

Sunday, 28 January 2018

Recycle and reuse a dud dishwasher

Many, no doubt, would regard a dishwasher as one of life's necessities. It is, of course, a luxury item, but it's one that always used to sit at or near the top of our list of favourite labour-saving devices. When we moved to the homestead, we started fresh with new kitchen appliances, pushing the boat out to go for A+++ energy ratings all-round, with a view to saving energy and cash in the long run.

Just look at that draining board!
A+++ dishwashers are few and far between and the budget wouldn't stretch to the top of the range premium brand names, so we were pleased to find one available in the next tier.

Long story short, it turned out to be hideously unreliable. Never before (and may it never be repeated) have we owned an appliance in such frequent need of repair. Naturally, this behaviour only manifested just after the end of the guarantee period.

We nursed it along for another couple of years but finally enough was enough. Its latest breakdown was also its last, guaranteed.

Over the course of that dishwasher's troubled life, we decided that it would not be replaced when it died. That day arrived yesterday and so the thinking cap went on: how best to reorganise our dishwashing?

The thing is, the massive amount of cooking, baking and preserving that goes on in the RGL kitchen means a colossal pile of washing up. Here's another thing: Has anybody ever possessed a dish draining rack that they were entirely satisfied with? They're generally a bit of an eyesore, never have enough space for the larger load of dishes and always have nooks and crannies that make it absurdly difficult to keep them properly clean.

Space for fully 14 place settings, with no avalanche risk.
Now we have it: Possibly the world's best, and certainly the world's most expensive dish rack and board!

The racks in the dishwasher are, of course, excellent, but they're far too big and ugly to be seen anywhere else but inside the dishwasher, so here's what I've done.

First of all, I stripped out everything removable from the interior of the dishwasher and cleaned all the nooks and crannies inside (frightening). So, no more spray arms or any other clutter within. Next, I gutted the workings, recovering pumps, heating elements, etc., from which I hope to make a few quid on eBay.

This left a big hole in the middle of the wash chamber base, which I simply closed off by cutting a sheet of plastic to size and sealing it in place, creating an easily wiped, watertight, stainless steel drip tray.

The one bit of the workings I left in the machine is the fan drier element, which I may possibly reconnect, if we decide we want our dish cabinet to have warm air drying capability.

We now have vast dish rack capacity, out of sight, where the washing up may be conveniently left to drip dry. It's easily cleaned and sufficiently robust that it should last forever. Result.

As a final touch, with just a hint of maliciousness towards the manufacturer, I modified the branding on the front of the machine.

Remind you of anything?

Wednesday, 6 December 2017

Make an eco pot scourer

The final product
Ever on the lookout for alternatives to throwaway plastic landfill items, I recently learnt that in the crofts and country kitchens of old the pot scrubbing brushes were made from heather. It's an abundantly available resource, growing in profusion on the moors round about us and though I don't imagine I'll be thatching the roof with it or making rope from it, as folks used to do, I figured I could definitely make heather pot scourers.

A web search turned up a museum photo of an old example, but nowhere could I find a write up on actually making one. Still, having seen what the finished product should look like, I was prepared to give it a go.

Tools and materials needed


  • Sharp knife
  • Marline or heavy-duty twine
  • Chopping board
  • Snips
  • Bunch of heather 
  • Two sets of pliers
  • A second pair of hands


Step by step


1 Harvest

Step one, obviously, was to go harvest some heather. I selected reasonably straight branches, with a good spread of finer twigs at the top end, and cut lengths of approximately 8 inches.

2 Thrash

Next, I thrashed the collected bundle against a stone wall to dislodge the old flowers, leafy greens and any other loose material, before taking it all indoors to work on.

Materials and tools needed for step 3

3 Trim and tie

After trimming and shaping with a sharp knife, I collected the bundle together and bunched it into more or less its final form. Here it's tremendously helpful to have a helper to hand, first to hold the bunch while you tie on the first knot of sturdy twine and then to tug on the other end of the knot to get it cinched in tight.

The first constrictor knot

The knot I would recommend is the constrictor. If no other good comes of this than more people learning the constrictor knot, my effort will be repaid. It's easy to tie and can be tightened as securely as a jubilee clip. See the tutorial for tying this super useful knot here.

Ready for a tug of war (Step 5)

5 Tighten knots

Have a pair of pliers each for yourself and your assistant to haul in tight on the ends. Once it's tight, finish each end with an overhand knot close in to the constrictor and trim off the excess. Add a second and a third band to the scrubber handle, trim the heather to the desired finish at either end and go do the washing-up! This scourer is also very useful for brushing up crumbs on the table.

That's all that's needed

Tuesday, 10 October 2017

Towards zero waste

Embrace the reused glass jar
It's unlikely that zero waste is possible for humans, but we can achieve zero food waste quite easily (especially if we don't have children!) and we can also aim to reuse as much as possible and create mainly biodegradable waste.

Here are a few of the things we do, and recommend to all thinking people, to reduce our resource requirements.

Take consumer responsibility seriously

Give your business to businesses that use little and biodegradable packaging such as cardboard or compostable vegware packaging. Of course, it can be hard to tell from the outside how much packaging is used, for example individually plastic-wrapped tea bags, but you're only going to buy that brand once. And it is impossible to know what kind of packaging is used when ordering online, but again you can reserve repeat custom for ethical companies.

Similarly, if you are running a business think carefully about the amount of packaging and the material to use.

Reuse if you can

Fruit leathers in former instant coffee jars
Zero waste kitchen storage looks pretty too
Glass recycling is all very well and does save some energy compared with using virgin materials, but it still uses a lot more energy than simply reusing glass containers, either in the home or through a bottle deposit scheme. So basically never throw out another glass jar again! The low-waste way of life does require a lot of glass jars and bottles for storage and, since we are not buying anything in jars any more, we've got to the stage where we're asking all of our guests to bring spare glass jars. Keeping your dry goods, herbs, spices and snacks in glass jars also looks good in the kitchen and is hygienic, keeping stored food safe from pests.

A good way to reuse cardboard, other than using it as fire-lighting material, is as mulch in the garden, for example as part of a no-dig 'lasagna' bed or around newly planted fruit trees, bushes or hedge plants or simply as weed suppression in a new area you plan to cultivate.

As for plastic - we so rarely have plastic bottles that we had to raid our neighbour's recycling when we wanted some for storing our kvass.

Cut out single-use plastic

There is no need for single-use plastic items. Plastic straws are not one of life's necessities. If you want a takeaway coffee, take your own mug. And there are affordable alternatives to plastic plates, cups and cutlery for picnics, barbecues or parties: palm leaf compostable tableware, wooden cutlery, kraft paper cups and plates.

Use your own containers

Always have a canvas or durable plastic bag with you, in case of unanticipated purchases. Take your own bags and containers when you go shopping. If you're lucky enough to live in a country where you can buy milk direct from the farmer, such as England or Germany, you can even refill your own milk churns. Buy dry goods from bulk shops where you can refill your own containers - or buy them in bulk online when they usually come in a 25kg paper bag, which can then be reused as a bin bag, as mulch or be burnt. Grown your own veg or buy fresh produce loose and transport in your own bags.

Make your own toiletries and cleaning materials


Homemade lip balm in reusable container
Cut out all those plastic bottles in the bathroom and kitchen by making your own toiletries. Waste reduction strategies include:
  • Using bars of soap instead of shower gels and liquid soap
  • Using shampoo bars or rye flour instead of shampoo
  • Making your own washing-up liquid and reusing old containers to store it
  • Using vinegar or steam to clean
  • Making your own lotions and potions and reusing jars to store them
  • Reducing the amount of make-up you wear or cutting it out altogether
  • For women, using a moon cup instead of sanitary towels or tampons
  • Using moistened old shirt rags instead of  wet wipes/moist toilet tissue and boil-washing them before reusing - an ideal way of using up old clothes, once they're past the 'work clothes' stage.

Eat up

Regularly check what needs to be eaten
Healthy snacks
  • Regularly check what’s in your fridge and store cupboards and which items need to be used up.
  • Eat up your leftovers. Turning them into a different dish the next day helps with this.
  • At least once a year, eat up everything in your store cupboards and freezer, clear them right out and start afresh. This will avoid items lurking at the back of the cupboard for years. You will have the peace of mind that everything in there is at most one year old. We don't even label our preserves because we eat them all within the year. If you're still eating five-year-old preserves you are making too many - take a year off from them and use your produce in a different way.
  • Change what you snack. For example, rather than buying a packet of crisps, make your own crisps or have an easy-to-make healthy homemade snack such as cold leftover potatoes with salt and pepper (the original potato snack), a bowl of kimchi, a hard-boiled egg, a slice of homemade bread with herb butter.
  • Impress on your children the need to eat up - there are helpful books around on the subject. Not offering too many alternatives seems to work.

Children, at least, can be reasoned with on the subject of food waste. Our only food waste is usually cat food. This is where livestock, like chickens or pigs, comes in handy. We basically treat our chickens as if they were pigs; they eat almost anything and love cat food.

Drink sensibly

  • Drink tap water rather than bottled mineral water. Filter it if need be.
  • Eat a juicy piece of fruit or make your own juices/smoothies/cordials rather than have packaged juice or sugary soft drinks.
  • Buy milk direct from the farm if you can.
  • Grow your own tea herbs. A few containers of tea herbs such as mint, lemon balm, camomile and sage don't take up a lot of space. They can even be grown on a windowsill in a flat or on a balcony.

Compost

  • Compost your food and garden waste.
  • Bury meat bones and fish heads in the garden to enrich the soil.

Buy second-hand

Save things from the landfill!
  • Preloved furniture is often a fraction of the price of new furniture and, depending on age, can be higher quality wood, with better workmanship and any VOCs (volatile organic chemicals) will be long gone. Charity shops, antiques barns, auctions, house clearances, furniture projects are all good sources for tables, chairs, sofas, chests of drawers, wardrobes and bed frames.
  • Charity shops are a great source of clothing too, especially for bargains on winter coats and party dresses, and you can assemble a fun mix-and-match china crockery selection and glassware for your kitchen.
  • There are lots of second-hand books in excellent condition around (I say this even though I am an author myself and, of course, wouldn't earn any money from second-hand sales of my own book). Ditto for second-hand technology such as laptops and mobile phones.


One by one, these are pretty simple changes to make, but each step by each individual takes us a little closer to the goal. Some require a little discipline but nothing too onerous. And all of the above save us money, sometimes serious money. The most important first step? Just thinking about what we consume and questioning whether we really need to consume it.


Friday, 22 September 2017

Further adventures in homemade toiletries

I talked in an earlier post about some of the harmful mystery chemicals used in body care products by reputable manufacturers, and about how easy it is to produce safe and effective homemade versions of most, if not all, necessary toiletries.

Here are a few more examples to increase the repertoire of basic building blocks, from which a myriad of possibilities extend.

Good dental hygiene without SLS

Tooth powder

It was actually toothpaste that got me started on all this years ago, when I discovered that the foaming agent Sodium Lauryl Sulphate, contained in nearly all commercial tooth pastes, was giving me terrible mouth ulcers.

Being slightly less savvy in those days, I merely looked around for another commercial toothpaste without the SLS. There are two or three, but what I didn't think too much about at the time is that they still have a range of other mystery chemical ingredients that don't seem to contribute materially to the core business of cleaning teeth.

Now I know about this simple and effective homemade tooth powder alternative: 

1 part Epsom salt
2 part Sodium bicarbonate (baking soda)
3 part Bentonite powder (Fuller's earth, diatomaceous earth, etc.)
+ a couple of drops Clove oil

Homemade tooth powder - yeah, it's a grey powder...
Combine all of these and blend using a mortar and pestle or an electric mini chopper and store in a small, wide-mouthed jar (or similar), which will allow you to easily press your moistened toothbrush into the powder and load it up for brushing. I was a little concerned about the lack of a fluoride supplement, so I checked it out with my dentist. He reassured me that this isn't of great importance to an adult with fully developed teeth in good condition. 

Epsom salt (Magnesium sulphate) is an old school substance with a surprising number of uses around the home and garden and also as a home remedy. The original tooth powder recipe I started with called for sea or rock salt, rather than Epsom salt. Its purpose in the mix is as a gentle scouring agent. Epsom salt does the same thing, but brings an additional benefit: I had been suffering a bit with leg cramps during the night and read somewhere that this can be due to a magnesium deficiency. Since I switched to the Epsom salt version of the tooth powder: no more cramps. Result!

Sodium bicarbonate (baking soda) is well known as a gentle scrubbing and cleaning agent. It also neutralises acidity, which is actually what causes the degradation of tooth enamel that leads to decay.

Bentonite is a type of clay, made up of the tiny calcite skeletons of prehistoric, microscopic, ocean-dwelling diatoms. It also has a range of home remedy uses, stemming from its powerful detoxifying properties. It can be made into a paste and used topically, to treat skin lesions, or prepared as a suspension in water and taken internally, to treat stomach upsets. In the jungles of South America, tapirs eat the stuff, which is what allows them to safely eat toxic plants that would otherwise kill them! In the tooth powder, it acts as a cleaning, mineralising and detoxifying ingredient.

Clove oil adds a pleasant flavour and natural antiseptic properties.


Sun lotion

Homemade sunscreen in reused container
Sunscreen is an essential for anyone who spends much time outdoors. It's another great example of the shock value to be had from reading the list of ingredients. For a start, as with pretty much every skin cream or lotion, the number one ingredient is Aqua. That's water to you and me! I suppose this comes down to a general consumer demand for 'non-greasy' lotion formulae, but it comes at a price. The active 'moisturising' ingredients absorbed by the skin from creams and lotions are, necessarily, oils and fats, not water. Anybody who has ever been swimming knows that water doesn't moisturise the skin. In order to keep oils and water nicely mixed, they have to be coated with emulsifiers: great source of mystery chemical ingredients right there. To thicken these watery creams to a nice consistency, one has to add gums, such as guar or xanthan. More items not required for the core purpose. The list goes on.

So the moisturising creams, ointments and sunscreen that I make have a simple lipid base. The basics are things like coconut oil, olive oil, shea butter, lanolin, beeswax. All readily absorbed by and beneficial to the skin. You can vary the ratios to get the sort of consistency you want. For lip balm, as an example, up the proportion of beeswax to make the final product that bit firmer.


2 heaped tbsp shea butter
3 heaped tbsp beeswax
2 heaped tbsp coconut oil
2 tbsp calendula oil (to make this, cover a handful of calendula blossom with eg olive or cold-pressed rapeseed oil and leave to infuse for up to a week, then strain out the flowers)
2 tbsp zinc oxide (be sure to get non-nano)
1 tsp lanolin
1 tsp raspberry seed oil
1/4 cup olive oil

The active sun blocking ingredients are the zinc oxide and raspberry seed oil. To increase the SPF, simply add more zinc oxide and/or rasp seed oil.

Melt and combine all in a double-boiler (or just a smaller pot inside a larger one, with hot-simmering water in the larger one), then pour into a jar and allow to set.

With this sunscreen it's important to make sure you're properly covered, so it should be reapplied several times a day. It may not be strong enough for Australia or the Med, but it does just fine for UK conditions. Experiment carefully until you're sure you have the right formula for your situation.

Bath salt

Nothing could be simpler:
Just add 1 cup of Epsom salts per bath!


The possibilities really are endless, particularly once you start making your own herbal extract ingredients, and especially if they're also home grown. The companies making big bucks out of all this stuff want you to believe that it's fabulously complex and the teams of scientists they have developing their products have developed formulae with unparalleled effectiveness. Sure, they work: but they're also much more complex than they need to be to work. The simple reason: maximisation of profit!

Wednesday, 2 August 2017

Things we don't buy any more

The new-look bathroom cabinet
We recently found a three-year-old supermarket receipt and were amazed to see how many items on our shopping list have been struck off since then. This got me thinking about consumer responsibility - how much personal responsibility and consumer power we have and how we should take a little time to reflect on what we actually need and what kind of business and production practices we want to support.

Do we really need another cheap T-shirt or fresh strawberries in mid-winter? Leaving out such items is no real sacrifice. A more sustainable lifestyle need not involve 'sacrifice', but it may mean less choice (though arguably better choice) and the reintroduction of seasonality in our diet, etc. It might involve spending a bit more on quality organic meat, dairy products or baked goods made by local producers, but overall you will save money by not buying rubbish you don't need, shrink your energy impact on the planet and create less waste. If quality food produced locally costs a little extra, then we should support that, rather than import, with all the packaging and transport implied from, for example, a country with water shortages, which is effectively exporting a resource they can't afford in the longer term.

Our switch in consumer habits happened naturally, without us really noticing, as we started to produce more and more of our own goods and it's had some surprising fringe benefits. Giving up shampoo and conditioner in favour of rye flour has put an end to my split ends, for example. Not buying any baked goods from the supermarket has eliminated heartburn and bloat. We have never eaten so well in our lives, both in quality and variety terms, and our personal grooming has not suffered by making our own toiletries nor is our house any less clean using our home-made cleaning materials. Not coincidentally, there is now a lot more space in the bathroom cabinet and we've no doubt improved our indoor air quality at the same time.

So what don't we buy any more?

Cleaning products

Home-made vs. shop-bought:
The home-made version lasts longer
despite its smaller size.
No more shop-bought, with all their unnecessary and toxic ingredients, washing powder, washing-up liquid and dishwasher detergent (we now make our own), rinse aid (now vinegar), household cleaner (we now use vinegar, bicarbonate of soda, steam etc.). Instead we buy bulk tubs of bicarbonate of soda (baking soda), soda crystals (washing soda), citric acid and borax substitute.  

Toiletries

Goodbye shampoo and conditioner (we now use rye flour with home grown herbal infusions), face cream, hand cream, sun lotion, lip balm, ointment and salves (we now make all these ourselves), tooth paste (we now make our own tooth powder), deodorant (we now use bicarbonate of soda), moist toilet tissue (now moistened cloths, cut from an old shirt, that are then boil-washed and reused), sanitary towels/tampons (I now use a mooncup, a fantastic product that more women should know about).

Fruit and vegetables

Plenty of veg here all through the year
Other than few top-up onions and garlic cloves we haven't bought any vegetables for three years now. It is surprising what all we can grow here in Scotland and it's no problem to grow enough throughout the year. It might be easier to grow some things in Spain, Italy, Portugal or Australia, but we are blessed with a mild climate here in the UK and shouldn't need many food imports at all. All that's required is a small shift in attitude, from 'What do I fancy?' to 'What is there to eat and cook with?' The seasonal constraints encourage experimentation and creativity in cooking. You can't just follow the same routine all through the year, making the whole enterprise more fun and interesting.

With fruit it's a little more difficult in our climate, but we haven't bought any fruit so far this year. This meant that after the fresh apples were gone, we were down to frozen berries, dried apple rings and fresh rhubarb from March until June when the strawberries kicked in. However, there were plenty of fresh greens to snack on instead, including peas, common fennel and salad leaves, so getting five or ten servings of fruit or veg a day was not an issue.

Jams, jellies and chutneys

A cupboard full of jams and chutneys
These are so easy to make and easily keep for a year without any added E-number preservatives. I try to tailor the quantities I make to what we actually need and don't even bother to label them since we aim to eat all jams, jellies and chutneys within the year, jams and jellies by end of June and chutneys by early August.

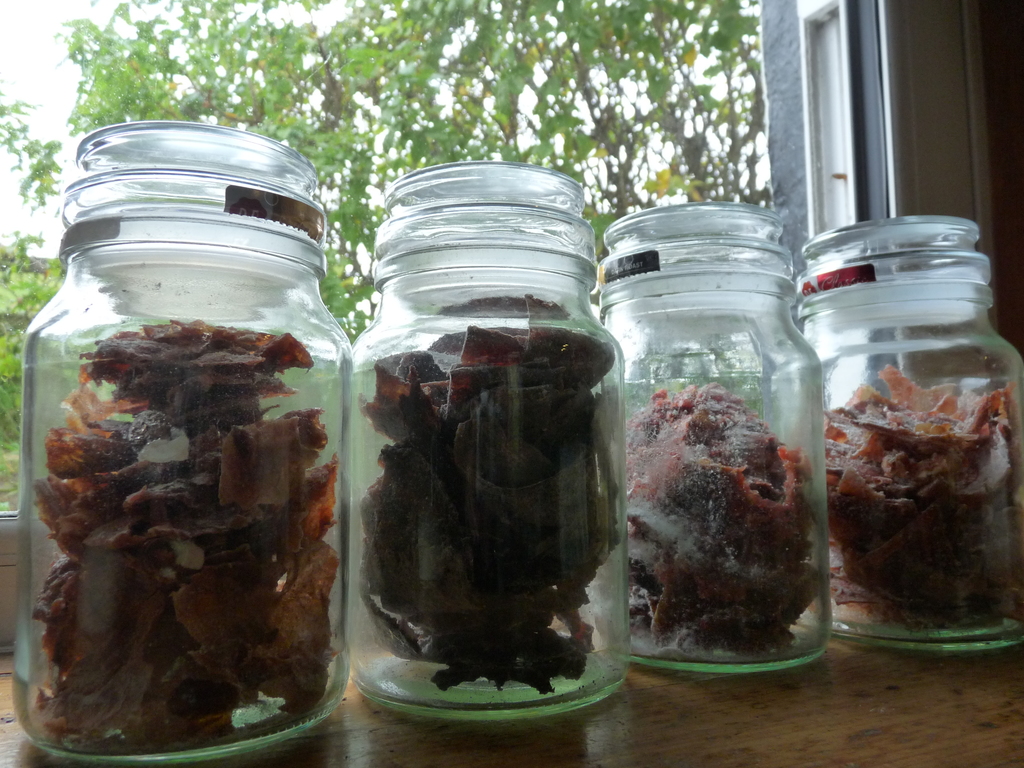
Meat and fish from the supermarket

We've made a big switch to more sustainable meat sources, i.e. vermin. Here this means rabbits, pigeons and, the most delicious vermin of them all, roe deer. All of these can be hunted locally and farmers are generally very happy to have someone reduce the number of rabbits and pigeons. Similarly, mackerel is a great eating fish and a freezer compartment can be quickly filled with them and other small scale local catches while they're in season.

Baked goods, bread and flour from the supermarket

Supermarket bread and cakes have never been a favourite, and finding out about the hidden ingredients didn't help. We now buy 20kg sacks of rye and wheat grains and mill our own fresh flour. As a by-product we get nutritious organic bran. The rye and wheat flour is used for baking sourdough bread, and the wheat flour is also used for all other baked goodies - cakes, pancakes, beer batter, pizza bases, dumplings, chapatis etc. The home-milled flour makes everything taste incredible. I was surprised at the difference it made.

Crisps, biscuits, chocolate, ice cream

We now make our own snacks - guaranteed without palm oil, which seems to be popping up everywhere these days from 'traditional' oatcakes and biscuits to chocolate. Homemade ice cream is just the best and a great way to use fruit from the garden.

Herbal tea bags

All herbs are brewed fresh from the garden where we have a large herbal tea plant collection and some of them are dried for winter use. No pesticides here!

Soft drinks and juices

We've never been big drinkers of juice or fizzy drinks, preferring plain water, tea, coffee or alcohol, so this was the easiest choice to make. Juices can be a good way to use up garden vegetables and fruit and we've now started making kvass from our rye sourdough loaf.

What we do still buy

This is why we call it the 'Reasonably Good Life'. Many of the original good-lifers, back in the 60s and 70s, tried to take it all the way to pure and total self-sufficiency. Entirely admirable ambition, of course, but in most cases the degree of discomfort and inconvenience entailed amounted to actual hardship, which resulted in their children, who might have been expected to carry on the revolution, wholeheartedly abandoning the dream for the ease of modern living. Our view is that total self-sufficiency, in our society and the world as it stands, is not realistically possible.

So, what do we still buy from the shops? Mainly dairy products, booze (though less of this than formerly, thanks to our homebrewing activities), grains, oils (with Scottish cold-pressed rapeseed oil now our preferred cooking oil) and vinegars, black tea and coffee, toilet roll. Despite rising prices, our shopping bill is way down - while our quality of life is way up. It's maybe not as convenient, but when did convenience become the be all and end all anyway?

Monday, 15 May 2017

Digging a Hügel

Couldn't have known what a big job it would be.
The single largest task we had planned for this spring was creating a large (about 12 x 4 metres, or 40 x 15 feet) new vegetable bed down in the bottom paddock.

We're nearing the end of our rolling programme of covering large areas with black plastic each year, for digging new beds the following year. The ground down there is quite heavy with clay, borderline boggy. The original intention was that it should be this year's potato bed, but when I started digging it, back in February or March, I soon concluded that it was far too wet and stony to be ready in time for planting potatoes! We found a better spot for the tatties and put this one on the back-burner for a little longer.

Happily, at just this time, we heard about Hügelkultur (literally mound- or hill-culture). This is a land management technique long practised in parts of Germany and Eastern Europe, in which marginal land is made cultivable by creating mounds of wood, woody waste from around the garden, plant and grass cuttings: basically whatever organic material is handy, with compost and soil over all. The result is a bed with a decaying core of organic matter that acts as a moisture store, while gradually breaking down, enriching and contributing to the soil.

Typically, the material is simply piled up on the surface of the ground, over an area of about one by two metres, to a maximum height of approximately one metre. In our case, the area we wanted to cultivate is considerably larger (of course, we could have just created a series of small mounds), and is also very windswept. Although we have planted hedges to break the wind, it'll be a few years yet before the shelter is really good and in the meantime we can't get into vertical gardening.

By this stage I was starting to realise the scale of it.
We decided to modify the method to suit our needs, inverting our Hügel and embedding it in the ground, so I started by digging a large trench. The first six to eight inches weren't too bad, coming up with the spade as hefty soil blocks, with some stones scattered throughout.

Couldn't have done it without the fishbox soil sifter.
Then came the 'stone zone'. A layer of another six to eight inches so packed with stones as to be impenetrable to spade or fork. I suppose at one time, 9000 or so years ago, this was the bed of a glacial meltwater runoff.

We had just invested in a Mantis tiller, which proved to be the very tool for the job. With that, I was able to gouge out the stone zone layer, into piles of earth and stone the we could shake through our homemade fishbox soil sifter. The soil was thus kept to go back on top and the stone added to our ever-increasing mound of rubble in the bottom corner of the garden.

Probably couldn't have done it without beer either.
Once underneath the stone zone, the ground was again penetrable to the spade, allowing me to dig out the deepest, central portion of the trench, down another 12 inches or so.

That's where the trench met the level of the ground water, and soon there was water pooling in the bottom of the trench, even though we were weeks into an unusually dry spell of weather. This hopefully means that the new bed won't ever need watering.

Now it was time to start filling it all back up again. We started out by sacrificing a couple of large sitka spruce firewood logs to the cause, providing the substantial, slowest-decaying core.

Step 1. Logs

Next came a layer of scorched gorse bush remains, which our neighbour had burnt off a nearby hillside the year before. Still woody matter, but much smaller pieces than the core logs.

Step 2. Brush
On top of that, we happened to have a very large pile of winter brassica ready to be cleared from the rest of the veg garden.

Spent winter brassicas
So, in it went. This will break down much more rapidly.

Step 3. Garden waste
We also chucked in some rotted manure at this point, for good measure.

Step 4. Manure
As the final, swiftest decaying layer, we spread in a load of grass cuttings.

Step 5. Grass
And then it was time to Mantis (yes, that is now a verb here) the soil back over top of all.

Step 6. Tilling and covering
The soil is, of course, still heavy clay. Very sticky when wet and easily compacted. So we added a bale of wood shavings (animal bedding type), to lighten things up a bit.

Step 7. Wood shavings to be mixed in

Soon it will be time to add squash seedlings. Hope they're going to like the new bed created especially for them!

Just add seedlings


Thursday, 30 March 2017

Dishwasher detergent without mystery chemicals

Distilled white vinegar rinse aid.
It's the promised follow-up on homemade dishwasher detergent! Part of our series on home and body care without mystery chemicals.

I'd been thinking about having a go at homemade dishwasher detergent for a while, basically since those pesky dishwasher tabs cornered the market completely and the last box of loose detergent disappeared from the shelf. Anybody else irritated by how often a bit of the tab remains undissolved at the end of the cycle, especially when running on an 'eco' setting? What about the extra packaging involved, with each tab in its own individual plastic wrapper? Oh, and what about the fact that the slight increase in convenience is a sneaky way for the manufacturers to get away with charging you more for less?

The usual round of online research turned up the usual spread of ways and means to achieve the desired end. Always a useful method to work out the parameters, as there is usually a multitude of ways to skin that cat. The beautiful thing is that homemade = tailor made, so be prepared to tweak the method to suit your exact requirements.

First, a couple of general points on dishwasher optimisation:

  • Clean the filter regularly!
    It's easy to forget about this altogether, but it seriously affects the operation of the machine.
  • Wash above 50°C (125°F).
    I know, I know - it's not an 'eco' setting. Here's the deal: Lower temperature washes allow potentially nasty little microorganisms to thrive in the machine. The higher temperature wash is more hygienic, cleans better and, so far as we've been able to tell, doesn't use significantly more energy. We've seen no increase (in fact, just the reverse) in our monthly electricity consumption since switching to higher temperature dishwasher cycles.
  • Invest in the most energy efficient dishwasher you can find on your budget.
    The difference in water and power consumption between A+, A++ and A+++ really adds up.

Now, on to the detergent. In the interests of full disclosure, I'll admit we didn't get it quite right on the first attempt, nor even the second. The recipe includes citric acid and soda crystals i.e. an acid and a base. It may be that in very dry climes, one can mix these with impunity in their powder form. Not so here, where relative humidity levels are generally north of 80%. So, when we put the powders together, they started to fizz gently and continued to do so for several days.

Homemade dishwasher tabs!
There was nearly a very useful consequence to this. When I noticed that the combined powders were getting a bit sticky and clumpy, I guessed that maybe we could make our own dishwasher tabs by pressing some into the compartments on an ice cube tray. It worked, but honestly, too much effort. It was the only useful material salvaged from the first batch however, as the remainder, when sealed into an airtight container, dissolved down to a small pool of goo.

That meant switching to a 2-component system. The rest was simple tweaking of proportions to suit the recipe to our particular water type (soft) and usual dish dirtiness levels (moderate).

The Recipe


That's all there is to it.
Component I - Mix a batch of this in advance and store in an airtight container. Add around 1.5 heaped tablespoons of this to the detergent compartment
  • 2 parts borax substitute
  • 2 parts soda crystals
  • 1 part coarse rock salt
  • (optional) a few drops of tea tree oil
Component II - Add around
3 teaspoons of this in with component I in the detergent compartment
  • Citric acid
For rinse aid, simply substitute white distilled vinegar. Fill the rinse aid compartment to the brim.

Here's what the ingredients do:
  • Borax substitute: Water softener. Degreaser. Mild bleaching agent (converts tiny amounts of water to hydrogen peroxide).
  • Soda crystals: Slightly more powerful degreaser. Also softens water.
  • Rock salt: the chunky crystals provide scrubbing and scouring action.
  • Citric acid: Descaling agent. Balances the pH (borax substitute and soda crystals are both quite alkaline). Improves rinse action.
  • Tea tree oil: Anti-microbial. Smells nice.
  • Vinegar: Clears streaks. Sterilising agent.

Just as we found with the homemade body care and other homemade cleaning products, this all adds up to significant cost savings without loss of performance, and eliminates the mystery, potentially unpleasant and environmentally unfriendly chemicals that seem to have found their way into all of these mass manufactured items. Happy dishwashing!