Showing posts with label Organic gardening. Show all posts

Wednesday, 12 December 2018

Why are we doing this?

Seasonal salad in December
We're often asked why we have chosen to live the way we live. Occasionally followed by: You're not ill, are you? Or: You have to admit it's kind of weird. We're both well educated and could be working highly paid jobs somewhere, living a 'normal' life.

We don't think it's weird at all. To our way of thinking, it's one of the few sensible things to do in this Anthropocene age: growing food, creating wildlife habitat, reducing consumption and waste. While it seems clear that we need to change our economic model globally - give up the unsustainable economic growth model and embrace a circular, localised economy - and change our diet to local, seasonal, organically grown food, we want to find out what that actually means and whether that is realistically possible. Rather than blocking streets in London, we want to find solutions that could be scaled up. We want to know the answers to questions like:

Food
Our store cupboard 

  1. What can we grow organically where we live?
  2. How does that change throughout the seasons?
  3. What kind of plant-based protein can we grow?
  4. What kind of seed for oil pressing can we grow?
  5. Is it possible to have a balanced, healthy and varied diet on only locally grown food?
  6. How do we save seed from (or otherwise propagate) the plants we like to eat?
  7. How do we best preserve the food that we grow?
  8. How do we feed livestock and pets in a sustainable way?

The answers so far:

  1. We can grow far more than we thought possible, an incredible diversity. Every year the list of what we grow grows longer. If you think you can only grow neeps, tatties and kale in Scotland, think again.
  2. While in the summer we can grow some Mediterranean crops like tomatoes, chillies and cucumbers under cover, our maritime climate also allows us to grow lots of leafy salad crops through the mild winter, both under cover and out in the open. Some crops are available most of the year (like oriental greens, mustard, radish and lettuce) or can be stored to last most of the year (like potatoes, beetroot, broad beans and onions), while some have a short season (most of the fruit, though they can also be frozen or dried for use during the winter).
  3. Protein crops: Not very many. Beans, peas and quinoa, that's pretty much it.
  4. Oil seed: Still working on that one. So far only oil pumpkins have produced a reasonable yield, but we're trying linseed and camelina this year.
  5. Varied diet: Oh yes! We have never eaten so well and had such a diverse diet as now.
  6. Seed saving: We're on a major seed saving drive. It's a lot of knowledge and skill to propagate plants and save seed, but luckily there are good books out there. Let's hang on to these important skills!
  7. Storing food: Basically preserve your produce in ways that you like to eat. In our case, this involves a lot of fermentation (kimchi), drying (fruit leathers, herbs for the winter), pickling, making jams/jellies/chutneys/relishes, lots of ice cream and, of course, booze.
  8. Fodder: We're trying to cut out soy and other imported food stuffs from our animals' food. This involves sprouting/fermenting grains for the chickens and cooking up crops like oil pumpkin and tiny tubers (Jerusalem artichokes, potatoes) for them. For the cats, this means feeding some fresh meat (usually rabbit, venison or pheasant roadkill) and sourcing soy-free British-made pet food.

Cleaning and waste
Soapwort dish soap

  1. What alternatives are there to chemical cleaners, soaps and toiletries?
  2. Can we make our own cleaning agents, soaps and toiletries from plants we grow in the garden?
  3. Can we hot compost human manure and safely use the resulting compost?
  4. Is there anything organic we can't compost?
  5. How can we cut out single use plastic from our lives?
  6. How can we reuse materials we already have?

The answers so far:

  1. Cleaning agents: There are some. We are now mainly using vinegar and bicarbonate for cleaning the bathroom and floors and soapwort liquid for doing the dishes. Soapwort is a plant we can easily grow lots of and we're planning to use it for washing our clothes and our bodies in the near future. That's natural saponin. For our hair, we've been using rye flour as shampoo for several years now and it's better than any shampoo we've ever used, especially mixed in herbal infusions of garden herbs and flowers. We make a tooth powder of salt, betonite clay and dried powdered fennel. The remainder of our toiletries are homemade products: lip balm, skin lotion/ointment and sun screen. All use bees wax and herb-infused oils. For our baths, we run the water through a mesh bag containing herbs and flowers.
  2. Home grown herbals: We use soapwort, calendula, comfrey, broad-leaf plantain, rosemary, lavender, rose petals, mint, lemon balm, chamomile etc.
  3. Humanure composting: It works well. Why would we contaminate our waters rather than using our manure as a resource?
  4. Non-compostibles: Not much, if we use thermophilic composting.
  5. Plastic reduction: Probably the easiest way is not to buy so much and to avoid shopping at supermarkets. Small businesses and shops are usually miles ahead when it comes to biodegradable packaging or reuse of containers. Growing and making things cuts out the most, of course, but you can also buy from farm shops or have a veggie box delivered to avoid packaging.
  6. Reuse: We're always working with reclaimed materials, especially wood and fabrics, but also things like metal fittings and glassware.  Rags from old T-shirts make great wet wipes, for example (boil wash after use). It's all about being flexible and thinking first about the alternative designs for a job rather than going with the same old.

Our PV array

Energy

  1. Is it possible in a domestic setting to live on solar panels and battery in Scotland?
  2. What habits do we need to change to live within the energy we generate?
  3. How can we lower our energy use to the bare minimum while still keeping warm, having hot water and food and light during the hours of darkness?

The answers so far:

  1. Solar energy: Yes, if you have an alternative source of heating for the winter, like a wood burner. But only if you really really reduce your electricity usage.
  2. Habits changed: Lots, especially when, how often and how we shower and when we run our appliances.
  3. Energy saving: Lots of ways. Using wash cloths or bucket and scoop instead of having a shower or bath, for example. Not washing clothes (other than underwear and socks) after one use only. Switching to all LED lights and A+++ appliances. Sweeping rather than hoovering. Using hand tools rather than power tools. Putting on extra layers rather than heating the whole house. Keeping the bedrooms at a lower temperature. And so on.

Fauna and flora
Wildflower bed

  1. What habitat can we create?
  2. What plants should we plant specifically to help local wildlife?
  3. If we plant hedges, trees and wild flowers and make wildlife ponds, will animal numbers and diversity increase?

The answers so far:

  1. Let's give over some of our land to wildlife habitat. This can take many forms: wildlife-friendly hedges and trees (like willows), wildlife ponds, wildflower meadows, 'untidy' areas with lots of herbs and flowers.
  2. Selecting plants: Do some research to see which plants your local butterflies require for food, for example. Planting early- and late-flowering plants is a good policy, letting things go to seed also provides a lot of food for wildlife.
  3. If we build it, will they come? Yes, they will! Our garden is buzzing, chirping and ribbeting. After dark in the summer it's hard not to step on a frog or toad. Newts, frogs, toads, dragonflies and damselflies have moved into our pond since we re-established it. Bird numbers have risen dramatically since our hedges filled in. Bumblebees, hoverflies, solitary bees, butterflies and moths are enjoying the many herbs and flowers.

All these things are achievable at the level of private individuals. We don't have to wait for governments and industries to get their act together (by which time it'll probably be too late anyway). If enough of us take these simple steps, the benefits will be realised by all.

Tuesday, 10 April 2018

Setting up for self-sufficiency from scratch

Broadforking a large new vegetable bed
Chatting with a friend who's just about to start working a croft has focused my mind on how I would set up our veg garden from scratch if I had to start over again and what I'd consider essential in a veg garden. We've worked these things out over several years and have implemented the suggestions below, but we could set up even quicker, with what we know now.

First of all, I'd identify the sunniest, best drained land by walking the land at diffent times in different conditions, like after heavy rain (be aware that light levels might quite different in winter, but spring to autumn levels are really the most important since that's mainly when you're growing). If it's sheltered as well - super. Otherwise hedge planting has to be top priority - put in a temporary windbreak fabric fence until the hedge is established (about three years). If it's reasonably level ground - even better, but you can work with terracing. It should also have easy access to water for watering (not so crucial in Scotland, but elsewhere it could be). If it's downhill from the house you can easily collect rainwater from your roof to water your veg.


Vegetables and herbs


Last year's squash bed
Raised beds
Part of the large herb garden
This area will eventually be totally
given over to perennial veg
Then I'd make a plan for four large vegetable beds (about 4m x 20m, scaled appropriately if you have less space) for the large crops: potatoes; onions, garlic, leeks and carrots; brassica; and a three sisters bed - courgettes and winter squashes with beans and sweetcorn (if you're lucky enough to live somewhere warm enough where these will grow outdoors - for us it's just squash). This makes it very easy to keep track of crop rotation, which can be a challenge otherwise. To minimise work I'd put down black plastic for a minimum of six months where these beds are going to go. This kills all the grass and weeds underneath and makes preparing the ground a lot easier.

If you think your ground is suitable consider no dig, in which case you can use cardboard as your base layer and top it with compost and organic matter. This uses a lot of compost, however, so think about cost implications. I'd advise trying to dig in several spots first, to see just how stony the ground is and what drainage is like. Much of our ground was very stony and drainage needed to be improved so no dig will have to wait. On the other hand, if your ground is too stony to do anything with, possibly the best way is up: making huegelkultur beds on top. That is, if it's not too windy to go upwards! We ended up making an underground huegel in a particularly wet part of ground.

In addition to the four large beds, I'd have a dozen raised beds for lettuces, salad leaves, beetroot, chard and crops that do better in raised beds such as celeriac. These beds don't have to have permanent structures; they can just be created by mounding up the soil. In this area there also needs to be space for an easy to move pea fence or trellis.

Somewhere near the house, I'd set up a herb garden with lots of perennial herbs and some annuals. This would also incorporate edible flowers, wild flowers and medicinal herbs (often the same plants!).

Next on the agenda would be an area dedicated to perennial vegetables, with some luxury crops such as globe artichokes and asparagus, some great staples such as Daubenton's kale, Good King Henry and a few varieties of perennial onions and some of those tubers that keep on coming like Jerusalem artichokes and oca.

The last of the winter crops and
the first of the spring crops
Then on to a polytunnel for extending the season. In this case, it is critical what the winter light levels are like since you'll be overwintering a lot of crops in it. Choose a very sunny levelish site with easy access to water. Our polytunnel is 20ft by 8ft, which is a great size for the home grower who doesn't want to grow vast quantities for sale but rather wants to keep growing salads and greens throughout the winter and have a wider option of veg to grow in the summer. Of course, it would be no problem to fill a larger tunnel, but it would also mean a lot more watering! A lot of things are better grown outside, such as onions, for example. And you don't have to worry about pests such as aphids as much. A 'cloudy' polytunnel cover is better than a fully transparent one since it lets plenty of light through but doesn't scorch plants in the heat. A south-facing conservatory or potting shed is very useful for pre-growing seedlings in the spring.

Fruit and nuts

When it comes to soft fruit, I'd get all my cuttings from other gardeners if possible, since they are so easy to grow from cuttings, especially currants and gooseberries. The same goes for vigorous rhubarb - a split of a plant that does well in your area is the way to go - and strawberry runners (which will need to replaced every three years to maintain vigour, easily done by taking runners from your plants in the summer after the harvest is done).

The orchard four years on
We have a dedicated soft fruit area, which could be netted over in a fruit cage arrangement (this makes harvesting easier since you can walk in and stand up). However, this hasn't been necessary so far, but it is a consideration in areas with flocks of pigeons especially. I've also made little hedges of berry bushes for most of the large veg beds and along the side of the main vegetable garden. I'd go for a huge variety of fruit, with some more unusual berries such as Siberian honeyberry (blue honeysuckle), Saskatoon berry and Chilean guava thrown into the mix to extend the fruit season. I'd rather err on the side of too many plants; that way, the birds can have some and there should still be enough left for you.

When it comes to fruit trees, I'd again err on the side of too many. We've ended up with eleven apple trees, two pears, two plums, two mirabelles, two mulberries, three cherries and one quince. It's crucial to get the pollination groups right, especially if you're in a remote area with no other fruit trees around! The one thing I would change next time is to make sure to have a couple of apple trees with apples that store really well; usually these are the late-fruiting varieties. We only went by flavour in our selection so none of our apples store particularly well without processing them.

Edible hedging around the veg garden
Other than planting an orchard, I'd also recommend incorporating edible plants into your hedging schemes. For example: crab apples, wild pear, wild plum, rosa rugosa (for rose hips), elder (for berries and blossom), hazel nuts, hawthorn (for berries), blackthorn (for sloes), sea buckthorn (for berries - this is quite a vigorous plant though, which can be invasive in some areas), guelder rose (for bark, anti-cramp medicine), willow (for wands and bark - natural aspirin - and as one of the best wildlife plants in the UK), tilia/linden (for leaves and flowers) and beech (for young leaves).

If I lived in a climate where they'd crop, I'd also plant lots of nut trees such as walnut, cobnuts and sweet chestnut. Now this is a really long-term proposition! Sadly, although they grow well enough here they only rarely produce a usable crop, with the one exception of hazelnuts - but we've yet to harvest a single nut from our 10+-year-old trees. In the meantime, we're going have a go at growing tiger nuts instead.

Following a programme like this will give a high degree of food self-sufficiency in just a few years, without needing to sacrifice interest and variety in the diet.


Wednesday, 4 April 2018

Sowing and growing peas

Plastic rain gutter + compost + peas


Real spring weather has yet to settle in here, but seed sowing and general preparation carry on all the same, in anticipation of the season finally turning.

Keep the compost moist
as they sprout.
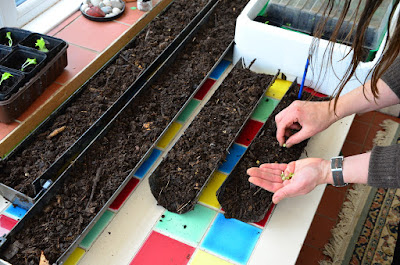
Yesterday it was the peas' turn to start their journey of another year. Last year we tried the excellent rain guttering method of sowing and pregrowing the peas. It worked very well, so we're sticking with it.

All you need is a few sections of plastic guttering, filled up with compost. Quite a bit of compost is needed, so definitely use homemade stuff if you can. Don't use super long sections - they have to be easy to transport around. End caps can be helpful in keeping the compost in; they can be removed at the sliding stage.

Slide them in! A knock against
a post can help if they're stuck.
Sow the peas as you normally would. We use a pencil to make a hole, drop the pea in and cover over. Keep the compost moist as the peas sprout and start to grow.

When it's time to plant them out, the real beauty of this method becomes apparent. Dig a shallow trench alongside your pea fence (or whatever arrangement you have in place for the peas to climb up). Then just slide the whole lot out from the guttering into the trench. This means minimal disturbance to the seedling roots and greatly reduced transplant shock.

Tender shoots are a terrible
temptation to birds.
Firm them in with the soil excavated from the trench, water, net them over, to protect from marauding blackbirds, and you're done. The netting can be removed once the pea plants have reached 'critical mass', i.e. when it would be hard for a blackbird to pull one out.

We usually plant peas for podding on one side and mangetout on the other side of the fence to avoid confusion at what stage to pick the pods! Once the peas are ripe and plentiful we collect as much seed as possible. Some of it can be sown again straight away, for pea shoots if winter comes early or for a second crop if not.

Overwintering peas

Can't wait to see them
looking like this again.
We're really big pea fans and, to get some of that fresh flavour we crave as early as possible in the season, we also grow some Douce Provence peas (the best variety for overwintering) over winter in the greenhouse. These we do exclusively with our own saved seed, since the casualty rate can be high, depending on the severity of the winter. We sow them around the end of October or early November, in the same pots and using the same climbing strings that will subsequently belong to the tomatoes.

Last year that yielded us our first peas on the 20th of April, a real treat to start the season. It might be a little later than that this time around, but they're flowering already.

Overwintering in the greenhouse: early peas.


Saturday, 1 July 2017

Favourite self-seeders

Camomile, a prolific self-seeder
The next best thing after perennial plants, in our opinion, is self-seeding annuals. For busy gardeners it's effective, convenient, effortless and very economical to let herbs and flowers seed themselves - you can always move them later or remove them if they threaten to take over. And if you want to be 100% sure of preserving the plants, collect some of the seeds (many of them are good for culinary use anyway) and sow them in late May in the rare event that no new seedlings have popped up. Here are some of our favourite plants that can be left to do their own thing:

Camomile

We seem to get plants a lot earlier than if we sowed them ourselves. The self-sown camomile really gets going rather early in spring and it doesn't mind being transplanted.

Borage flower

Borage

A very vigorous self-seeder, borage is an all-round winner in the garden. Beloved by pollinators, with pretty, edible flowers, this nitrogen-fixer can be made into a fertiliser tea just like comfrey and, according to Bob Flowerdew, also makes an excellent green manure.

Dill

We let this go to seed anyway, to harvest dill seeds for use in pickles and bread, and it usually comes up the next year.

Parsley

Much easier to let it self-seed in its second year than to start the seeds indoors in early spring.

Wild rocket, a welcome 'weed'

Salad leaves

Wild rocket is our favourite weed in the veg patch! We always let rocket flower in early spring when there's not much else around for the pollinators and as a bonus comes the vigorous self-seeding that follows. Land cress is a tasty salad crop that self-seeds everywhere but its tendencies do have to be curbed a little.

Coriander

Coriander is probably the most annoying annual herb to grow. At least under our conditions, it goes to seed so quickly. No sooner are the first leaves out that you need to harvest and freeze away the excess before the plants go all feathery, then flower and go to seed. You might as well exploit that and let the plants seed more rather than having to sow a new batch every few weeks. We also collect some seeds for culinary use and these could be used to sow the following spring.

You only need to sow them once

Nasturtiums

Our favourite companion plant, nasturtiums are everywhere in the garden. We eat the young leaves and the flowers in salads and pickle the seeds for use on pizzas (and anywhere that capers would be used). Nasturtiums are also brilliant weed suppressing ground cover - we have them around the Jerusalem artichokes, under the bean poles, underneath hedges etc. and actively encourage them to spread into weedy areas across the fence.

Self-seeded calendula in the wildflower border

Calendula

Another great all-round companion plant, calendula pops up early in the year when left to its own devices. We mainly use it to make herbal oil, which is then a key ingredient in lip balm, ointments and lotions. And hopefully soon in our own soap! It's also nice as part of a herbal tea mixture.

Pretty purple poppy

Wildflowers

We have several kinds of poppies in the garden, including ones with edible seeds for baking. We always collect some seeds to spread them around further, but they do an admirable job of sowing themselves in their wildflower border where they are joined by campion, another lovely self-seeding wildflower.

Parsnips

Parsnip seed doesn't store long and is fickle to germinate. We leave a couple of plants in the soil over winter and let them go to seed in spring. We have been collecting the seed for planting the following spring, but the self-seeded plants have been so much earlier and more vigorous than our own efforts that we will simply let the parsnips seed themselves next year.

It's always a nice surprise to see the distinctive seedlings pop up in the spring. You can't mistake a little borage or nasturtium for anything else. Happy lazy gardening, everyone!

Sunday, 30 April 2017

April round-up

Typical April harvest
April has been a super busy month. It started with another major sowing session indoors (cucumbers, tomatillos, asparagus, quinoa, amaranth, broccoli, basil, coriander, celeriac, cantaloupe melons), followed by sowing the maincrop potatoes (Setanta, Sarpo Axona and Blue Danube) outside in a new bed that required major stone removal - in fact, it now has a little stone wall running alongside it. We also planted out the peas sown in pieces of guttering, a method that worked extremely well.

One of the three black chicks
Unfortunately, we had an egg-eating incident - chicken caught in flagrante, pulling an egg from underneath another hen and chomping into it - so we had to soup our favourite hen. This prompted us to get the incubator on. Last round of incubating our own eggs. Next time we'll get some hatching eggs in from a local farm, probably Welsummers and Copper Marans, to mix up our gene pool again. Out of 10 eggs we got seven chicks, hatched on 25 and 26 April. Unfortunately, one chick died in the first night and another one had straddle legs, which we taped in place with a sticking plaster tether, but the little one did in the second night. At least the other five are doing very well.

Tomatoes in the polytunnel
Then it was warm enough to plant out the tomatoes into the polytunnel and greenhouse. Since our area is bad for potato blight (which also unfortunately affects their tomato cousins), we grow our tomatoes in containers and mainly inside: 16 in the polytunnel, 8 in the greenhouse and 6 in the conservatory. We'll try a couple of the Magic Mountain variety outside since it's been billed as very blight-resistant. We put a little bit of manure in the bottom of every tomato pot (and, later, we'll do the same for chillies, peppers, cucumbers and melons).

Brassica set-up

We also set up a brassica fortress outside. Each of our dozen kale, romanesco, cauliflower, Brussels sprouts and red/Savoy cabbage seedlings has been planted inside a bottomless pot that has a ring of copper tape running around it. The pot to protect against the occasionally fierce winds here and the copper tape to keep slugs and snails at bay. Then the whole lot is netted over to protect the seedlings from birds and cabbage white butterflies. There will still be some losses, but at least this gives them a better chance.

The herbal tea plants are all up and we've even had some first flush green tea from our Camellia sinensis bushes. Though mainly we drink pots of lemon balm tea, various mint teas (apple, Swiss, Moroccan, Eau de Cologne and mixtures thereof) and sage.

The big new bed
The second large new bed in the bottom paddock has turned out to be too boggy to be used as a straight-up bed so we've decided to turn it into a Hügelkultur bed. This means that Jim will dig a trench which we'll fill with all kinds of organic materials and then make a little mound over it afterwards. Not too high though because of the wind! We're definitely horizontal gardeners here, anything that sticks out over the hedge will be scorched.

Overwintering pea in the greenhouse
The edible and medicinal flower bed has been dug at last and sown with edible poppies, two types of calendula, two types of cornflower, coriander, dill, cumin, chives, camomile and salad burnet. Just the amaranth and sunflowers to add next month. The old ash pit next to our front door has been sown with a profusion of wild flower seeds (plus some 5 for £1 Lidl flower seeds). And Jim has mowed the entire garden for the first time this season! All the fruit trees, some fruit bushes and some hedges have been mulched with the grass clippings.

Femspot cucumber in the conservatory
This year we're trying an all-female cucumber variety for the first time. Very impressed so far with the vigour of these Femspot cucumbers. They've already demanded potting up. We'll have to keep them separate from our other cucumber variety, Crystal Lemon, so the Femspots will be in the conservatory and greenhouse and the Crystal Lemons in the polytunnel. It'll be nice not to have to help along with pollination on the Femspot plants! On the Crystal Lemon cucumbers and the cantaloupe melons, I will be using cotton buds to hand-pollinate the female flowers from the male flowers.

First radish of the season
We've also started some direct sowing outside: carrots, scorzonera, lettuce, chard, New Zealand spinach, turnips, radishes, beetroot. Most of the direct sowing will be happening in May though. I've also continued experimenting with crops in the polytunnel. Already the first carrot seedlings are up and the beetroots are way ahead of the outdoor ones. I've also popped in one courgette, for extra early courgettes, and some pak choi. The tunnel's filling up fast!

Homemade pasta, on the homemade drying rack
On the food preparation and preservation side, we've made a batch of purple-sprouting broccoli & Daubenton's kale kimchi, some rhubarb ice cream and our first ever pasta - from home-milled flour with our own eggs. Definitely will be making our own pasta from now on!


Tuesday, 13 December 2016

Essential culinary herbs

Golden majoram
Before I had my own herb garden, I cooked very little with fresh herbs. I only had rosemary and chives in a windowbox then and buying fresh herbs from the supermarket was pricey. It took me some time to get used to having this resource of fresh herbs close at hand. Now I don't use stock cubes or powdered stock any more, just salt, a selection of herbs and our homegrown veggies. Fresh herbs can really make a dish, and most of them are easy to grow and maintain and look pretty. A nice thing about growing your own herbs is that you can choose unusual varieties such as orange thyme or golden majoram.

Tea herbs aside, my list of essentials for a low-maintenance herb garden is as follows:

Perennial herbs
Aromatic bay leaves

  • Bay leaves
  • Lovage
  • Rosemary
  • Thyme
  • Oregano/marjoram
  • Chives
Orange thyme

Bay leaves are a key ingredient in most soups and stews. They are particularly important in game dishes such as venison. My little tree gets harvested quite heavily. The freshly crushed fresh bay leaves are super aromatic - no comparison to the shop-bought dried stuff.

Lovage, the 'maggi plant', is very high on my list of essentials as it enriches all soups and stews, giving it the Maggi flavour without the MSG. It's potent so one or two leaves per dish will do. One plant should be ample to supply one kitchen for one year. Lovage dies back over the winter but grows vigorously the rest of the year. Apparently plants can reach two metres in height! It's wonderful in chicken soup or rabbit casserole.

Rosemary, thyme and oregano/majoram are all easy to grow, need little looking after (just basic weeding) and are a boon in any Mediterrean dishes or on roasted vegetables. Chives can also provide a bit of aphid control around roses so I've planted some in a bed with roses rather than with the rest of the herbs.

Annual herbs
Giant Italian parsley

  • Parsley
  • Basil
  • Coriander
  • Dill

Annual herbs are a bit more work than perennials - as they need to be sown every year. Dill is probably the easiest of my pick of annual herbs since it's sown directly into the ground and then only needs basic weeding.

Parsley can take a while to germinate, but once it gets going it's a no-bother crop. I usually let it flower in the second year and this year it obligingly grew from seeds dropped the previous year.

Basil is an indoor crop in Scotland and I like to grow some more unusual varieties that aren't available in the shops.

Coriander is probably the trickiest of the herbs I grow. For a continuous crop I'd need to sow four or five times. It can go to seed very quickly, especially in warmer weather, so now I harvest the large leaves as soon as they appear (before they go all feathery) and freeze what I can't use immediately. I find Vietnamese coriander much easier to grow and it has the advantage of being perennial (though tender). I keep it going from cuttings (they easily root in a glass of water) moved inside over winter. It's not exactly the same flavour, but it serves a similar purpose.

Optional extras
Winter savoury, good with beans

  • Sage
  • Common fennel
  • Winter or summer savoury
  • Lemongrass
  • Vietnamese coriander

Sage and fennel are mainly used for tea, but occasionally sage is used for a sage butter sauce and the fennel seeds are great in spiced cakes. As they are both perennial, they make easy additions to the herb garden. Winter and summer savoury are nice with legumes. As winter savoury is a perennial it's slightly less work than the summer savoury, which needs to be sown annually. And, since Asian herbs such as lemongrass and Vietnamese coriander happily grow here (and aren't easy to come by in the supermarket), I usually add them to the herb bed.

Cucumber-flavoured borage
I do grow some other herbs, but I don't use them very much. Borage and hyssop, for example, are definitely grown to encourage pollinators rather than for culinary purposes. Consider which herbs you like in your cooking and then incorporate them into your garden, either in pots, a bed or as part of the border (since they do look pretty). Our bay tree has pride of place in the front garden as befits such an important herb.

One plant of each herb is probably enough, especially for the perennials (you might need a few plants of the annuals, if you're planning to make pesto for example). So the space requirement is minimal. A small patio area will do. Make sure the herb garden is near enough to the kitchen that you can easily grab the herbs while cooking.

And if you need any more herbs than you've got growing yourself you can always forage for some wild herbs and spices.

Monday, 17 October 2016

The Quinoa Experiment

Gets on well with the local wildlife
Okay, so never mind about quinoa's current status as a trendy superfood. Leave to one side the allegations, recently debunked, that the quinoa craze has had a harmful effect on the poor farmers in its Peruvian homeland. What interested us about it was that it grows well in our temperate maritime climate and, just as importantly, is meant to be relatively easy to process by hand.

We're always interested in how we can push back the limits of our self-sufficiency, within the bounds of reasonability. Grains are a prime example: Sure, we could grow some oats, barley or even wheat. It's the processing of them on such a small, manual scale where the idea hits the buffers of reasonableness. Threshing and winnowing would simply take far too much time and effort for the return.

The suggestion that extracting the edible parts of quinoa could be feasible on our scale held out the hope that maybe we could produce some of our own grain. Not only that, but the plants are not unduly bothered by the pests present in our part of the world and the grains themselves are coated with a soapy protective layer (which has to be soaked away before culinary use), rendering them unpalatable to birds, rodents and such like.

We bought some seeds and gave it a go. Here are our observations at the end of the first season.

Cut and ready for wilting
The seeds were sown indoors in early May and the seedlings planted out in mid-late June. We finished up with 14 plants for the trial and planted them out over 6 or 8 square metres. Apart from the usual weeding and mulching around the plants, that was it. They required no special care.

Getting along into September, we could see the grains forming in the flowers and start to release them with a gentle rub between the palms. Slight nervousness about the approaching equinoctial gales prompted us to harvest them at that time, which was probably a mistake. We should have held our nerve and left them until late September or early October and we'd likely have had a much better yield.

Ducking under these all the time was not ideal
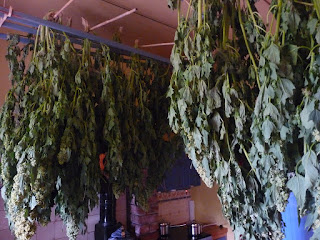
After the plants are cut, they need to be hung up or spread out somewhere dry to wilt down for several days, which makes the grains easier to release. Another lesson learnt here: make sure you have a dry covered place outside or in an outbuilding to do this! We improvised with a drying rack in the conservatory and the laundry pulleys in the kitchen. This arrangement worked, but it was a bit intrusive.
 
At the threshing station

Threshing and winnowing by hand is pretty straightforward. It really is just a matter of rubbing the flower heads between your palms, over a bucket and then gently blowing away the chaff.

As you can see in the photo, a quarter-inch riddle or similar is a help in screening out the larger debris.


Loads! Right...?

We passed a very pleasant afternoon at the threshing and winnowing and when we were finished it looked like a pretty respectable quantity.

Two or three days later, after it had dried down completely, the yield looked less impressive. 500g was what we ended up with.

Will we try it again? I'm going to say yes, we'll give it one more go and hold out for a later harvest, which ought to at least double the yield. The prize of a home-grown nutritious grain deserves another chance.

Wednesday, 3 August 2016

Easy composting


Ready to be dug in: a handful of the good stuff.
Compost (noun and verb)! It is truly wonderful stuff. Producing your own eliminates waste, cuts costs and contributes in a big way to the very pleasing symmetry that emerges as you build your own garden ecosystem.

There are many methods, all with their own fanatical devotees and all of which can yield excellent results. Some folk get deeply into the science of it and go to considerable lengths to get all the parameters tweaked to perfection, but at its simplest it should be very easy indeed and still yield excellent results.


The starting material
So, here's the way we do it: Bung everything into a simply constructed bin of (pressure treated) wooden slats, with gaps to encourage air flow. Approximately 3'x3' (1 metre each side) is a good size. Cover with a piece of (natural fibre) carpet, to retain warmth and keep out weed seeds.

When I say 'everything', I mean a good chunk of your garden and kitchen 'waste' (more on this below), plus other things like chicken droppings (if you keep hens), seaweed (if you're near the sea), and maybe a bit of wood ash (if you heat with wood). It's important to include some woody bits (shavings from the hen house or hedge clippings are perfect). You can even pee on it, if you feel so inclined.


The compost cascade
Then, when 'Bin #1' is full, turn over your row. This is the clever bit. Regularly turning over the heap thoroughly mixes and aerates the material and enormously accelerates the breakdown process.

We have a row of six identical bins, so when it's time for the turn, Bin #5 gets emptied into Bin #6, Bin #4 into Bin #5 and so on. We're talking months to finished product here, not years.

As well as being the clever bit, this is also the one hard work bit. A removable front section to the bins vastly improves the ergonomics of shovelling and forking out the contents.

Bins #5 and #6 (and sometimes even #4) have good, usable compost, ready to work its magic wherever needed in the garden.


What to include:
Cats optional
  • Harvested out vegetable plant remains, like bean stalks and carrot tops
  • Kitchen 'waste', like (crushed) egg shells, coffee grinds, vegetable peelings, apple cores, etc.
  • Hedge clippings
What to go easy on:
What to avoid:
  • Meat (if you've got any to get rid of, feed it to the dog, hens or whatever)
  • Raw tubers, or portions thereof (it's an incredibly fertile sprouting environment)
  • Weeds (the last place you want weed seeds)
  • Any other sort of seed heads
  • Citrus peel (these make fantastic fire lighters when dried)
Quick growing, vigorous comfrey
Useful extras:
  • Manure
  • Seaweed
  • Comfrey

Composting comfrey
A comfrey patch makes a super useful adornment to the garden, but make sure you get a variety that can only propagate by root cuttings and also that you have a single permanent home for it. It's unfussy, but if you have a damp bit of ground that you'd like dried out a bit and don't have much other use for, this is ideal.

Comfrey has several desirable properties. It sends down a very deep root system (up to 10 metres, according to some sources) and thus brings to the surface minerals and nutrients that others can't reach. It grows quickly: we can crop it three times in a single season. It breaks down rapidly, whether in compost (also works as a compost accelerator) or as mulch.