Showing posts with label Homemade. Show all posts

Wednesday, 12 December 2018

Why are we doing this?

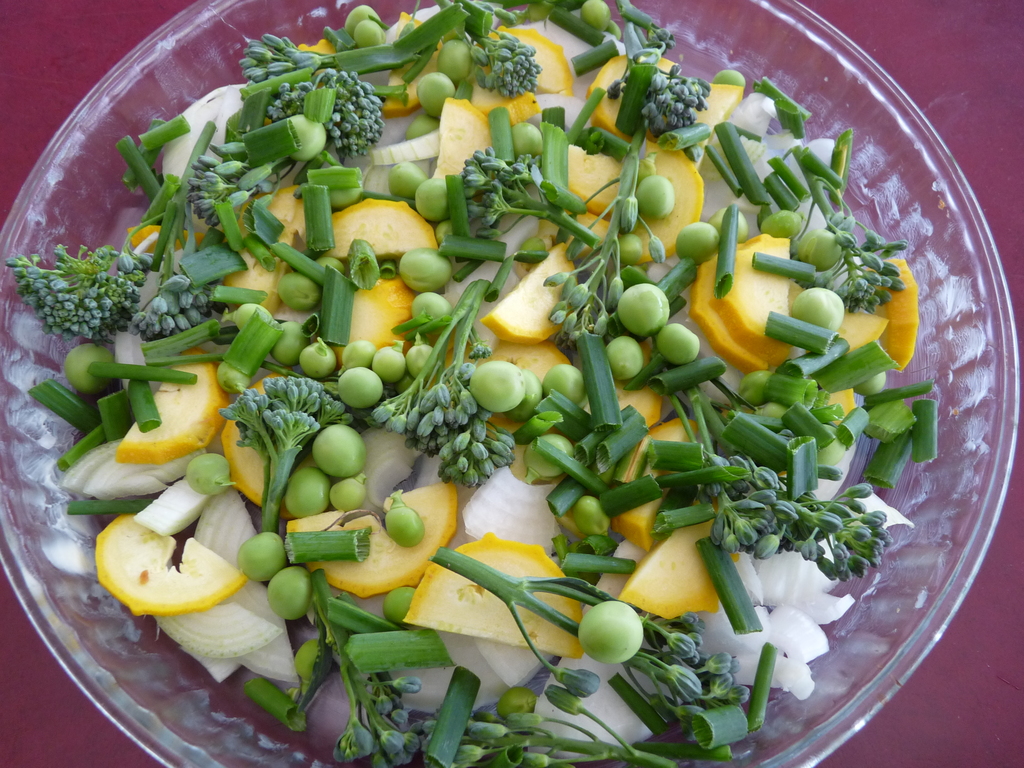
Seasonal salad in December
We're often asked why we have chosen to live the way we live. Occasionally followed by: You're not ill, are you? Or: You have to admit it's kind of weird. We're both well educated and could be working highly paid jobs somewhere, living a 'normal' life.

We don't think it's weird at all. To our way of thinking, it's one of the few sensible things to do in this Anthropocene age: growing food, creating wildlife habitat, reducing consumption and waste. While it seems clear that we need to change our economic model globally - give up the unsustainable economic growth model and embrace a circular, localised economy - and change our diet to local, seasonal, organically grown food, we want to find out what that actually means and whether that is realistically possible. Rather than blocking streets in London, we want to find solutions that could be scaled up. We want to know the answers to questions like:

Food
Our store cupboard 

  1. What can we grow organically where we live?
  2. How does that change throughout the seasons?
  3. What kind of plant-based protein can we grow?
  4. What kind of seed for oil pressing can we grow?
  5. Is it possible to have a balanced, healthy and varied diet on only locally grown food?
  6. How do we save seed from (or otherwise propagate) the plants we like to eat?
  7. How do we best preserve the food that we grow?
  8. How do we feed livestock and pets in a sustainable way?

The answers so far:

  1. We can grow far more than we thought possible, an incredible diversity. Every year the list of what we grow grows longer. If you think you can only grow neeps, tatties and kale in Scotland, think again.
  2. While in the summer we can grow some Mediterranean crops like tomatoes, chillies and cucumbers under cover, our maritime climate also allows us to grow lots of leafy salad crops through the mild winter, both under cover and out in the open. Some crops are available most of the year (like oriental greens, mustard, radish and lettuce) or can be stored to last most of the year (like potatoes, beetroot, broad beans and onions), while some have a short season (most of the fruit, though they can also be frozen or dried for use during the winter).
  3. Protein crops: Not very many. Beans, peas and quinoa, that's pretty much it.
  4. Oil seed: Still working on that one. So far only oil pumpkins have produced a reasonable yield, but we're trying linseed and camelina this year.
  5. Varied diet: Oh yes! We have never eaten so well and had such a diverse diet as now.
  6. Seed saving: We're on a major seed saving drive. It's a lot of knowledge and skill to propagate plants and save seed, but luckily there are good books out there. Let's hang on to these important skills!
  7. Storing food: Basically preserve your produce in ways that you like to eat. In our case, this involves a lot of fermentation (kimchi), drying (fruit leathers, herbs for the winter), pickling, making jams/jellies/chutneys/relishes, lots of ice cream and, of course, booze.
  8. Fodder: We're trying to cut out soy and other imported food stuffs from our animals' food. This involves sprouting/fermenting grains for the chickens and cooking up crops like oil pumpkin and tiny tubers (Jerusalem artichokes, potatoes) for them. For the cats, this means feeding some fresh meat (usually rabbit, venison or pheasant roadkill) and sourcing soy-free British-made pet food.

Cleaning and waste
Soapwort dish soap

  1. What alternatives are there to chemical cleaners, soaps and toiletries?
  2. Can we make our own cleaning agents, soaps and toiletries from plants we grow in the garden?
  3. Can we hot compost human manure and safely use the resulting compost?
  4. Is there anything organic we can't compost?
  5. How can we cut out single use plastic from our lives?
  6. How can we reuse materials we already have?

The answers so far:

  1. Cleaning agents: There are some. We are now mainly using vinegar and bicarbonate for cleaning the bathroom and floors and soapwort liquid for doing the dishes. Soapwort is a plant we can easily grow lots of and we're planning to use it for washing our clothes and our bodies in the near future. That's natural saponin. For our hair, we've been using rye flour as shampoo for several years now and it's better than any shampoo we've ever used, especially mixed in herbal infusions of garden herbs and flowers. We make a tooth powder of salt, betonite clay and dried powdered fennel. The remainder of our toiletries are homemade products: lip balm, skin lotion/ointment and sun screen. All use bees wax and herb-infused oils. For our baths, we run the water through a mesh bag containing herbs and flowers.
  2. Home grown herbals: We use soapwort, calendula, comfrey, broad-leaf plantain, rosemary, lavender, rose petals, mint, lemon balm, chamomile etc.
  3. Humanure composting: It works well. Why would we contaminate our waters rather than using our manure as a resource?
  4. Non-compostibles: Not much, if we use thermophilic composting.
  5. Plastic reduction: Probably the easiest way is not to buy so much and to avoid shopping at supermarkets. Small businesses and shops are usually miles ahead when it comes to biodegradable packaging or reuse of containers. Growing and making things cuts out the most, of course, but you can also buy from farm shops or have a veggie box delivered to avoid packaging.
  6. Reuse: We're always working with reclaimed materials, especially wood and fabrics, but also things like metal fittings and glassware.  Rags from old T-shirts make great wet wipes, for example (boil wash after use). It's all about being flexible and thinking first about the alternative designs for a job rather than going with the same old.

Our PV array

Energy

  1. Is it possible in a domestic setting to live on solar panels and battery in Scotland?
  2. What habits do we need to change to live within the energy we generate?
  3. How can we lower our energy use to the bare minimum while still keeping warm, having hot water and food and light during the hours of darkness?

The answers so far:

  1. Solar energy: Yes, if you have an alternative source of heating for the winter, like a wood burner. But only if you really really reduce your electricity usage.
  2. Habits changed: Lots, especially when, how often and how we shower and when we run our appliances.
  3. Energy saving: Lots of ways. Using wash cloths or bucket and scoop instead of having a shower or bath, for example. Not washing clothes (other than underwear and socks) after one use only. Switching to all LED lights and A+++ appliances. Sweeping rather than hoovering. Using hand tools rather than power tools. Putting on extra layers rather than heating the whole house. Keeping the bedrooms at a lower temperature. And so on.

Fauna and flora
Wildflower bed

  1. What habitat can we create?
  2. What plants should we plant specifically to help local wildlife?
  3. If we plant hedges, trees and wild flowers and make wildlife ponds, will animal numbers and diversity increase?

The answers so far:

  1. Let's give over some of our land to wildlife habitat. This can take many forms: wildlife-friendly hedges and trees (like willows), wildlife ponds, wildflower meadows, 'untidy' areas with lots of herbs and flowers.
  2. Selecting plants: Do some research to see which plants your local butterflies require for food, for example. Planting early- and late-flowering plants is a good policy, letting things go to seed also provides a lot of food for wildlife.
  3. If we build it, will they come? Yes, they will! Our garden is buzzing, chirping and ribbeting. After dark in the summer it's hard not to step on a frog or toad. Newts, frogs, toads, dragonflies and damselflies have moved into our pond since we re-established it. Bird numbers have risen dramatically since our hedges filled in. Bumblebees, hoverflies, solitary bees, butterflies and moths are enjoying the many herbs and flowers.

All these things are achievable at the level of private individuals. We don't have to wait for governments and industries to get their act together (by which time it'll probably be too late anyway). If enough of us take these simple steps, the benefits will be realised by all.

Sunday, 28 January 2018

Recycle and reuse a dud dishwasher

Many, no doubt, would regard a dishwasher as one of life's necessities. It is, of course, a luxury item, but it's one that always used to sit at or near the top of our list of favourite labour-saving devices. When we moved to the homestead, we started fresh with new kitchen appliances, pushing the boat out to go for A+++ energy ratings all-round, with a view to saving energy and cash in the long run.

Just look at that draining board!
A+++ dishwashers are few and far between and the budget wouldn't stretch to the top of the range premium brand names, so we were pleased to find one available in the next tier.

Long story short, it turned out to be hideously unreliable. Never before (and may it never be repeated) have we owned an appliance in such frequent need of repair. Naturally, this behaviour only manifested just after the end of the guarantee period.

We nursed it along for another couple of years but finally enough was enough. Its latest breakdown was also its last, guaranteed.

Over the course of that dishwasher's troubled life, we decided that it would not be replaced when it died. That day arrived yesterday and so the thinking cap went on: how best to reorganise our dishwashing?

The thing is, the massive amount of cooking, baking and preserving that goes on in the RGL kitchen means a colossal pile of washing up. Here's another thing: Has anybody ever possessed a dish draining rack that they were entirely satisfied with? They're generally a bit of an eyesore, never have enough space for the larger load of dishes and always have nooks and crannies that make it absurdly difficult to keep them properly clean.

Space for fully 14 place settings, with no avalanche risk.
Now we have it: Possibly the world's best, and certainly the world's most expensive dish rack and board!

The racks in the dishwasher are, of course, excellent, but they're far too big and ugly to be seen anywhere else but inside the dishwasher, so here's what I've done.

First of all, I stripped out everything removable from the interior of the dishwasher and cleaned all the nooks and crannies inside (frightening). So, no more spray arms or any other clutter within. Next, I gutted the workings, recovering pumps, heating elements, etc., from which I hope to make a few quid on eBay.

This left a big hole in the middle of the wash chamber base, which I simply closed off by cutting a sheet of plastic to size and sealing it in place, creating an easily wiped, watertight, stainless steel drip tray.

The one bit of the workings I left in the machine is the fan drier element, which I may possibly reconnect, if we decide we want our dish cabinet to have warm air drying capability.

We now have vast dish rack capacity, out of sight, where the washing up may be conveniently left to drip dry. It's easily cleaned and sufficiently robust that it should last forever. Result.

As a final touch, with just a hint of maliciousness towards the manufacturer, I modified the branding on the front of the machine.

Remind you of anything?

Saturday, 13 January 2018

Homebrew vinegar

There's a lot of hype about apple cider vinegar out there, principally surrounding all the amazing health benefits that come with consuming it. No doubt there's a lot of truth to the claims, whether or not you believe the 'hand-waving' explanations of how it works. Getting the good stuff, however, raw and unpasteurised, can be an expensive proposition.

Around a year ago, a friend asked us, "Are you making your own vinegar yet?" Good question! Hadn't really thought about it. Not very much research was required to determine that we already had nearly everything we needed to give it a try.

In the beginning: strawberry wine plus apple cider vinegar

Basic process

Here's the deal: Acetic acid bacteria in a vinegar culture convert ethanol (alcohol) into, yes, acetic acid, which is the vinegary part of vinegar. Some of the cheaper shop-bought stuff is, in fact, just acetic acid mixed with water and possibly some colouring. A true, brewed, vinegar is a much more complex mixture, full of useful vitamins, minerals and those all-important probiotics, reflected in the culture that produces it. A SCOBY (symbiotic culture of bacteria and yeast) is what you want. This is a community of micro-organisms, derived from naturally occurring, wild populations, that work together to ferment products such as kefir, kombucha and vinegar.

Batch 3: apple cider. The SCOBY from the strawberry
vinegar is at the bottom and a new one is forming on top.
An easy way to obtain your starter culture is to invest in a quality bottle of raw, unpasteurised apple cider vinegar. The other key component is something alcoholic. If you're already a brewer of hedge wines or cider: bingo!

To start off our first batch of vinegar, we took two bottles of homemade strawberry wine (so 1.5L), poured them into a 2L bottle, added 1 cup of raw, unpasteurised apple cider vinegar, covered the top of the bottle with a clean cloth, and then left it quite alone for several months.

When next we looked, there was a fine SCOBY at the surface, which appears as a whitish and floppy disc of material. This is then retained for starting further cultures with fresh alcohol.

Using the stuff

Strawberry vinegar, in old malt vinegar bottles.
We bottled up the beautiful strawberry vinegar and started using it immediately. Given how widely apple cider vinegar is touted as a near-miraculous health tonic, we were interested to try consuming our own vinegar in the same way. Most suggest adding a spoonful of vinegar to a glass of water and this is what we now do, several times each day. It makes a lovely, refreshing beverage, with a pleasing tang to it.

As for the health benefits, well, we're both feeling good. I would certainly say that it seems to be very beneficial to the digestion. We also learned that poultry keepers have long recognised the benefits of supplementing their flock's water supply with a little brewed vinegar in their water supply. Our hens were just coming out of a heavy moult, had been off the lay for over a month and certainly looked as if they could do with a tonic. Within a month, and just at midwinter, they came back into lay. Coincidence? Who knows, but they certainly love their tonic and we're keeping it up - 1 tbsp into their 2L drinker daily. In case you're wondering if they drink that only because they have no choice, don't worry - they have several sources of water, including a small stream that flows through their area. They practically queue up to get to the tonic when it's put out.

We have since brewed a batch of gorse flower vinegar, also delicious, and have another batch of apple cider vinegar brewing now, from homemade cider. One advantage of brewing the vinegar from wine, as opposed to cider, is that you get a stronger vinegar (more alcohol = more acetic acid), which is useful if you wish to use it for pickling (minimum 5% acetic acid required).

Particularly if you're already homebrewing anyway, give this a try. The absolute deliciousness of homebrewed vinegar has been a revelation to us.


Wednesday, 6 December 2017

Make an eco pot scourer

The final product
Ever on the lookout for alternatives to throwaway plastic landfill items, I recently learnt that in the crofts and country kitchens of old the pot scrubbing brushes were made from heather. It's an abundantly available resource, growing in profusion on the moors round about us and though I don't imagine I'll be thatching the roof with it or making rope from it, as folks used to do, I figured I could definitely make heather pot scourers.

A web search turned up a museum photo of an old example, but nowhere could I find a write up on actually making one. Still, having seen what the finished product should look like, I was prepared to give it a go.

Tools and materials needed


  • Sharp knife
  • Marline or heavy-duty twine
  • Chopping board
  • Snips
  • Bunch of heather 
  • Two sets of pliers
  • A second pair of hands


Step by step


1 Harvest

Step one, obviously, was to go harvest some heather. I selected reasonably straight branches, with a good spread of finer twigs at the top end, and cut lengths of approximately 8 inches.

2 Thrash

Next, I thrashed the collected bundle against a stone wall to dislodge the old flowers, leafy greens and any other loose material, before taking it all indoors to work on.

Materials and tools needed for step 3

3 Trim and tie

After trimming and shaping with a sharp knife, I collected the bundle together and bunched it into more or less its final form. Here it's tremendously helpful to have a helper to hand, first to hold the bunch while you tie on the first knot of sturdy twine and then to tug on the other end of the knot to get it cinched in tight.

The first constrictor knot

The knot I would recommend is the constrictor. If no other good comes of this than more people learning the constrictor knot, my effort will be repaid. It's easy to tie and can be tightened as securely as a jubilee clip. See the tutorial for tying this super useful knot here.

Ready for a tug of war (Step 5)

5 Tighten knots

Have a pair of pliers each for yourself and your assistant to haul in tight on the ends. Once it's tight, finish each end with an overhand knot close in to the constrictor and trim off the excess. Add a second and a third band to the scrubber handle, trim the heather to the desired finish at either end and go do the washing-up! This scourer is also very useful for brushing up crumbs on the table.

That's all that's needed

Monday, 13 November 2017

Processing apples

Harvest from one of our 12 trees
This year we had our first proper apple harvest, which prompted me to look into storing them for eating fresh through the winter. In a nutshell, I learnt that late-season apples are the best bet for storage and found out that hardly any of our apple varieties store well at all. So, Plan B: process them all before they were past their best, which turned out to be by early November for the two varieties with the best keeping qualities. We've now discovered that we actually prefer the apples in their processed forms rather than fresh, which is just as well.

We made every apple thing we could think of:
  • Dried apple rings
  • Apple sauce
  • Apple ice cream
  • Fruit leathers
  • Apple jelly
  • Apple wine
  • Cider
  • Cider vinegar
  • Apple cordial
  • Apple crumble (or pie)
  • Baked apples.

I forgot about apple butter, which is on the agenda for next year. Apart from the cider, everything turned out absolutely delicious. The cider is OK, but probably best mulled or turned into vinegar. Next year, wine or cordial only!

First off, I'd recommend the following equipment for speedy processing of apples:

  • steam juicer
  • electric dehydrator
  • apple corer
  • mandolin slicer.
Rosehips and apple thinnings in the steam juicer

I don't peel any of my apples - life's too short and there's all sorts of goodness in the skin. To separate the apples into juice and pulp, simply fill the steam juicer with your apples (zero processing needed) and steam for 90 to 120 minutes. Steaming times will depend on the apple type (one cooking variety took just 60 minutes to break down completely). Drain the juice (usually around one litre per fill) and reserve for further processing into jelly, wine, cider or cordial. Then mash through as much of the remaining pulp as possible. This results in a very fine apple sauce, which can form the base of fruit leather, ice cream or simply be bottled or frozen as apple sauce. Any few remaining bits left in the top of the steam juicer are gratefully received by chickens (if you have any) or can be composted.

Dried rings

Apple ring central
This is a great way of preserving apples. The dried rings are lovely to snack on and can also be used in baking throughout the year. Our main use for them is in our morning porridge, where they reconstitute into apple bits. Since we don't buy any fruit, I made 17 large jars of these, which will hopefully last us until June when the new season strawberries will be ripe.

To make apple rings, core the apples and mandolin slice to about 4mm (just under a quarter inch) thick. To prevent discolouration, dip into water with a little citric acid or lemon juice before dehydrating. Lay out the apple rings on your dehydrator trays so that they're not touching and dry at around 60°C/140°F. Drying times will vary depending on the dehydrator and your atmospheric conditions (anything from 4 to 10 hours) - best to check every hour from about the 4 hour mark and remove the rings that are dry. They should be leathery, but not brittle, and not show any signs of moisture when cut. Let them cool for 5-10 minutes and immediately store in an airtight jar.

Apple sauce

A very versatile and efficient way to store apples. You can either freeze it or bottle/can it (using the water bath method or heat the filled preserving jars in the oven at 170°C until bubbles start to form). Either use the puree from your steam juicer or core and mandolin slice 20-odd apples and cook on low heat with a little sugar, plus raisins or spices such as cinnamon or ginger, if desired. The sauce itself makes a lovely dessert, served on its own or with cream, creme fraiche or ice cream, or can be used as a pie filling at a later stage.

Ice cream

Follow our recipe for strawberry ice cream, but substitute the strawberry puree with fine apple sauce (from the steam juicer) and a generous pinch of cinnamon. This is one of the most delicious ice creams ever and we don't know why this isn't a known flavour.

Fruit leathers

Apple and quince fruit leather
The big discovery of the autumn. Wonderful, healthy snacks and fun to make! Simply make an apple sauce, add sugar, spices (cinnamon, ginger or chocolate are good) or other fruit of your choice (mash in quinces for a bit of zing or autumn raspberries, for example). Spread about 0.5cm thick on a piece of silicone sheet, plastic liner or similar and dry either in the dehydrator at 60°C/140°F for about 8 hours (scrape off the sheet about halfway through and place directly on the dehydrator mesh trays) or on the lowest setting on your oven (usually around 70°C). Leave to cool, cut into handy sized pieces with a pair of scissors and dust with icing sugar so that the pieces won't stick to one another (also looks nice). Store in an airtight glass jar.

Jelly

A good way to use up some of the apple juice from the steamer. Apple is good in a jelly combined with rosehips, elderberry or infused with rose geranium.

Wine

Follow our recipe for hedge wine using the juice from the steam juicer. Try adding some rosehips, brambles, elderberries or blackcurrants to the apples in the steam juicer for a nice blend of flavours. These wines can also be used to make vinegar at a later stage (see below). In my opinion, apple wine is one of the best homebrews, delicious hot or cold.

Cider

Small batch of cider
Since we didn't know anyone with a cider press to make cider the traditional way and didn't want to invest in one, I used the ready-sterilized juice from the steam juicer. It was quite a lot of work, running the steam juicer five times to get five litres of juice for a small batch, but at least I got plenty of by-products for making fruit leather! The result is rather tart, but hopefully bottle conditioning will improve it - we added a little sugar at bottling stage to carbonate it. Otherwise it will all go into vinegar production.

Vinegar

To make vinegar from cider or wine, you need to add some 'mother' culture to your alcohol to convert it to acetic acid. You could just leave the cap off your bottle, tie over a clean rag and hope for the best. However, for surer results and to speed up the process, add a cup of unpasteurised cider vinegar to your alcohol for your first batch, then tie over a clean rag and store it in the dark for at least a couple of months before straining it and feeding your resulting gloopy 'mother' with some more hedge wine or cider.

Cordial

Hot fruit cordials are a real delight in the cold days of late autumn and winter. Again, it's nice to combine the apples with rosehips, elderberries or blackcurrants for this. Once you've extracted the juice, add sugar to taste (usually 100-200g per litre) and then bottle/can for long-term storage. I'd err on the side of too little sugar, since you can always add a spoonful of honey to your hot cordial when you're diluting it with hot water. Unfortunately, I only made five half-litre bottles of apple & rosehip and apple & elderberry cordial this year and we're already on the last bottle. Next year, there will be a lot more of these.

Apple crumble (or pie)

Apple berry mix waiting to be crumbled
I'm usually too lazy to make things as involved as pies, but am happy to make a crumble every day! Core and slice the apples (with a mandolin slicer if you wish) and layer in an oven-proof dish. Sprinkle over 2-3 tbsp of brown sugar, depending on the tartness of the apples. Cover with a crumble mixture (100g flour, 50g sugar, 50g soft butter, a little bran if desired) and bake at 175°C/350°F for about 35 minutes or until crumble goes golden brown and apples are soft when pricked with a fork. Serve with creme fraiche, cream or ice cream.

Baked apples

Core the apples, stuff with dried fruit and chopped-up nuts of your choice, bake until they split and are all soft inside. Sprinkle over sugar mixed with cinnamon and serve with custard or double cream.

That's all our apples used up! And we now have a good system in place for efficient processing next year.


Friday, 22 September 2017

Further adventures in homemade toiletries

I talked in an earlier post about some of the harmful mystery chemicals used in body care products by reputable manufacturers, and about how easy it is to produce safe and effective homemade versions of most, if not all, necessary toiletries.

Here are a few more examples to increase the repertoire of basic building blocks, from which a myriad of possibilities extend.

Good dental hygiene without SLS

Tooth powder

It was actually toothpaste that got me started on all this years ago, when I discovered that the foaming agent Sodium Lauryl Sulphate, contained in nearly all commercial tooth pastes, was giving me terrible mouth ulcers.

Being slightly less savvy in those days, I merely looked around for another commercial toothpaste without the SLS. There are two or three, but what I didn't think too much about at the time is that they still have a range of other mystery chemical ingredients that don't seem to contribute materially to the core business of cleaning teeth.

Now I know about this simple and effective homemade tooth powder alternative: 

1 part Epsom salt
2 part Sodium bicarbonate (baking soda)
3 part Bentonite powder (Fuller's earth, diatomaceous earth, etc.)
+ a couple of drops Clove oil

Homemade tooth powder - yeah, it's a grey powder...
Combine all of these and blend using a mortar and pestle or an electric mini chopper and store in a small, wide-mouthed jar (or similar), which will allow you to easily press your moistened toothbrush into the powder and load it up for brushing. I was a little concerned about the lack of a fluoride supplement, so I checked it out with my dentist. He reassured me that this isn't of great importance to an adult with fully developed teeth in good condition. 

Epsom salt (Magnesium sulphate) is an old school substance with a surprising number of uses around the home and garden and also as a home remedy. The original tooth powder recipe I started with called for sea or rock salt, rather than Epsom salt. Its purpose in the mix is as a gentle scouring agent. Epsom salt does the same thing, but brings an additional benefit: I had been suffering a bit with leg cramps during the night and read somewhere that this can be due to a magnesium deficiency. Since I switched to the Epsom salt version of the tooth powder: no more cramps. Result!

Sodium bicarbonate (baking soda) is well known as a gentle scrubbing and cleaning agent. It also neutralises acidity, which is actually what causes the degradation of tooth enamel that leads to decay.

Bentonite is a type of clay, made up of the tiny calcite skeletons of prehistoric, microscopic, ocean-dwelling diatoms. It also has a range of home remedy uses, stemming from its powerful detoxifying properties. It can be made into a paste and used topically, to treat skin lesions, or prepared as a suspension in water and taken internally, to treat stomach upsets. In the jungles of South America, tapirs eat the stuff, which is what allows them to safely eat toxic plants that would otherwise kill them! In the tooth powder, it acts as a cleaning, mineralising and detoxifying ingredient.

Clove oil adds a pleasant flavour and natural antiseptic properties.


Sun lotion

Homemade sunscreen in reused container
Sunscreen is an essential for anyone who spends much time outdoors. It's another great example of the shock value to be had from reading the list of ingredients. For a start, as with pretty much every skin cream or lotion, the number one ingredient is Aqua. That's water to you and me! I suppose this comes down to a general consumer demand for 'non-greasy' lotion formulae, but it comes at a price. The active 'moisturising' ingredients absorbed by the skin from creams and lotions are, necessarily, oils and fats, not water. Anybody who has ever been swimming knows that water doesn't moisturise the skin. In order to keep oils and water nicely mixed, they have to be coated with emulsifiers: great source of mystery chemical ingredients right there. To thicken these watery creams to a nice consistency, one has to add gums, such as guar or xanthan. More items not required for the core purpose. The list goes on.

So the moisturising creams, ointments and sunscreen that I make have a simple lipid base. The basics are things like coconut oil, olive oil, shea butter, lanolin, beeswax. All readily absorbed by and beneficial to the skin. You can vary the ratios to get the sort of consistency you want. For lip balm, as an example, up the proportion of beeswax to make the final product that bit firmer.


2 heaped tbsp shea butter
3 heaped tbsp beeswax
2 heaped tbsp coconut oil
2 tbsp calendula oil (to make this, cover a handful of calendula blossom with eg olive or cold-pressed rapeseed oil and leave to infuse for up to a week, then strain out the flowers)
2 tbsp zinc oxide (be sure to get non-nano)
1 tsp lanolin
1 tsp raspberry seed oil
1/4 cup olive oil

The active sun blocking ingredients are the zinc oxide and raspberry seed oil. To increase the SPF, simply add more zinc oxide and/or rasp seed oil.

Melt and combine all in a double-boiler (or just a smaller pot inside a larger one, with hot-simmering water in the larger one), then pour into a jar and allow to set.

With this sunscreen it's important to make sure you're properly covered, so it should be reapplied several times a day. It may not be strong enough for Australia or the Med, but it does just fine for UK conditions. Experiment carefully until you're sure you have the right formula for your situation.

Bath salt

Nothing could be simpler:
Just add 1 cup of Epsom salts per bath!


The possibilities really are endless, particularly once you start making your own herbal extract ingredients, and especially if they're also home grown. The companies making big bucks out of all this stuff want you to believe that it's fabulously complex and the teams of scientists they have developing their products have developed formulae with unparalleled effectiveness. Sure, they work: but they're also much more complex than they need to be to work. The simple reason: maximisation of profit!

Thursday, 24 August 2017

Brew your own hedge wines

Crab apple wine for dessert
Rosehips and apples in the steam juicer
Making your own booze from foraged or garden fruit is simple and rewarding. A good hedge wine is no substitute for a good red wine - but it definitely has its own place in the drinking panoply. Often home-made wines are quite sweet and make nice dessert wines. Tart wines are good for cooking with and for turning into home-made vinegar. Both tart and sweet hedge wines make wonderful mulled wine. On a chilly wet night, hot fruit wine is the ultimate comfort drink. Just add sugar to taste while you're heating up the wine. We haven't bought any cheap red wine for making mulled wine or cooking with since we started brewing our wines.

People make wine from just about everything, even pea pods and rhubarb. We've experimented quite a bit over the past four years and we find some are worth the effort and others not. We haven't tried rhubarb but suspect it might fall into the 'probably not worth it' category. Some flavours are good to mix (rosehip with apple, for example).

Probably not worth it

  • Pea pods: This has been described as similar to Riesling - obviously by someone who never tasted actual Riesling! It's wine that tastes strongly of peas, which made it brilliant for cooking risotto with, where it added a pea flavour to the rice.
  • Gorse flower: A pain to pick! We'd been hoping for something with a hint of coconut. Instead we got a bit of a rough sherry. Again, good for cooking only.
  • Carrot: There are much nicer ways to consume carrots!

Bramble wine

Well worth it

  • Rosehips
  • Elderflower
  • Elderberry
  • Crab apple
  • Apple
  • Plum
  • Gooseberry
  • Bramble
  • Combinations therof

Drinkable

  • Parsnip
  • Strawberry

Ready for bottling

How long does it take?

We usually start our 5-litre batches in a large plastic bucket, rack (i.e. transfer) them into a demi-john with a fermentation lock after about a week, then rack a couple more times over the following six months. After about six months, we bottle. Ideally, you'd then leave the bottles for another six months and start drinking your wine exactly a year after starting the process. In reality, we start drinking them soon after bottling, safe in the knowledge that some of them are going to continue maturing.

What equipment do you need?

Our recommended list would be:
Fermenting in the demi-john
  • Steam juicer: a very easy way to get juice from your fruit.
  • Oxygen steriliser powder: to sanitise your equipment.
  • Hygrometer: to measure the specific gravity of your wine. This tells you how much sugar you need to add and how strong your wine is going to be, if fermented to completion.
  • Large plastic bucket with lid: to start the ferment. Ideally this should have a scale on it and it's very useful to add a thermometer strip on to it so that you know when it's ready to add yeast.
  • Wine yeast
  • Demi-johns: you'll need quite a few of these.
  • Rubber bungs with fermentation locks, to fit your demi-johns
  • Racking cane
  • Syphon hose
  • Bottling wand
  • Empty bottles, ideally with reusable stoppers or screw caps
  • Optional: Campden tablets and finings

A little sample after bottling

The process

Making hedge wine is much simpler than brewing beer. We follow this straightforward procedure:

  1. Steam the fruit for 90 to 120 minutes in the steam juicer.
  2. Meanwhile, sterilise your plastic brewing bucket, a large wooden spatula and a small measuring jug.
  3. Pour the hot juice into the plastic bucket. It should be about 1 litre of concentrated juice.
  4. Add 1kg of sugar and stir well with a large wooden spoon to dissolve the sugar in the juice.
  5. Top up with cold water to the 5-litre mark and stir again.
  6. With the measuring jug, take a sample of the liquid and measure the specific gravity in your hygrometer. Add more sugar if needed. We usually aim for a specific gravity of 1080. Taste the sample for interest's sake.
  7. When the temperature of the liquid drops to about 24°C, add 1 tsp of wine yeast. Stir and loosely pop on the lid.
  8. Leave to ferment at room temperature for a week or so. You'll see that it's fermenting by the 'foam' appearing on the surface and the sediment forming on the bottom (and by the tasty smell).
  9. Sterilise a demi-john, rubber seal, fermentation lock, racking cane and syphon hose.
  10. Syphon the wine from your bucket into the demi-john, taking care to leave most of the sediment behind.
  11. Leave for a couple of months, rack again, leave again, rack again.
  12. After about six months, fill into sterilised bottles. A bottle wand, though not strictly necessary, is extremely useful for this as it makes it easy to stop and start the procedure with each bottle.

Cheers!


Wednesday, 16 August 2017

Coping with a courgette glut

The courgette-marrow spectrum
Layering veg for a crustless quiche

Half an hour later
Spot the yellow flecks of courgette
Young courgettes, ideal for the BBQ
And then there's the flowers to eat as well
First piece of advice: pick 'em small. I like to pick ours at roughly half the typical supermarket size (as at the far end of the courgette spectrum on the right). At that stage, the courgettes are so tender and tasty that they can be chopped raw into salads. It's a lot easier to deal with 20 small courgettes than with 20 marrows. This typically means daily picking, so if you're only visiting your courgette patch on the weekends, it's marrows for you! If you grow yellow varieties the fruit are a lot easier to spot and you won't get as many hiding and making it to marrow size.

If you do end up with marrows, my favourite recipe is spicy fried marrow rings:
Cut the marrow into 1cm-thick discs and press out the seeds with your fingers, making rings. Mix 3tbsp of flour with 1tsp coriander, 1tsp chilli powder and 1/2tsp salt. Dip the marrow rings into the flour mixture on both sides and fry in vegetable oil until the flesh is soft and the outside crispy on both sides. Serve with yoghurt or creme fraiche.

Other marrow options include stuffing with mince, making marrow jam (surprisingly tasty though not quite a substitute for a good berry jam) or using it as part of a piccallili pickle mix.

However, I do prefer courgettes before they get to marrow stage. Then my currently preferred recipe is to turn them into a crustless quiche, which is a simple and super tasty way of using up whatever you've happen to have in the garden:
Butter a pie dish and layer with vegetables. Start with a layer of onion slices, followed by sliced courgettes (peas, broad beans, chard and broocoli are also very good in this) and some chives. Mix 250ml cream with 4 eggs, season with salt and pepper. Pour over the layered vegetables and top with grated cheese. Bake for 30 minutes at 170°C. Serve hot or cold.

Courgette cake is a fun way to use courgettes, though not necessarily a good glut coping strategy, since you only need one or two per cake. Here's an easy courgette bran loaf, which is our standard elevenses bite. It's not very sweet and best served with butter and homemade jam. If you make it often enough (we get through one every two days) you'll eliminate a fair number of courgettes.
Mix together 1 cup wheat bran, 1 cup sultanas, 1/4 cup brown sugar and 1 cup milk. Leave to stand for an hour. Then add 1 cup wholemeal flour, 1tsp bicarbonate of soda, 1/2 cup grated courgette and 1 egg. Mix and spoon into a greased loaf tin. Bake for 45 minutes at 150°C. This is a very flexible cake. You can use grated carrot or beetroot instead of courgette or 1 cup of berries such as currants, blueberries or raspberries.

Another good way of eating young courgettes is as the original vegetarian sausage. Rub with vegetable oil, salt, pepper and herbs, wrap in foil and toss on the barbecue. Or dip in beer batter (100g flour, 1tsp ground fennel seeds, 1tsp chilli powder, 1/2tsp salt and enough ale to make up to double cream consistency) and pop into the deep-fat fryer.

Then, of course, there are all the usual Mediterranean recipes that you can throw courgettes into: risotto, lasagne, ratatouille, bolognese sauce, carbonara sauce etc. And you can even make a tasty sandwich spread from courgettes.

Possibly the best way to use up a lot of courgettes in one go is to make relish. This is very useful stuff and keeps well, too.

Whatever you do, don't freeze your courgettes, raw or blanched (though cooked, in a dish such as ratatouille is fine). The texture goes all rubbery. Some people dry their courgettes in thin slices - I tried this once but didn't find the result particularly appetising or useful. However, I'm willing to try again if someone suggests a good way of using the dried courgette slices.

If you still have any courgettes left over, give them to friends, family and passers by. People are usually delighted to receive them - unless they have a glut of their own to deal with!

Wednesday, 2 August 2017

Things we don't buy any more

The new-look bathroom cabinet
We recently found a three-year-old supermarket receipt and were amazed to see how many items on our shopping list have been struck off since then. This got me thinking about consumer responsibility - how much personal responsibility and consumer power we have and how we should take a little time to reflect on what we actually need and what kind of business and production practices we want to support.

Do we really need another cheap T-shirt or fresh strawberries in mid-winter? Leaving out such items is no real sacrifice. A more sustainable lifestyle need not involve 'sacrifice', but it may mean less choice (though arguably better choice) and the reintroduction of seasonality in our diet, etc. It might involve spending a bit more on quality organic meat, dairy products or baked goods made by local producers, but overall you will save money by not buying rubbish you don't need, shrink your energy impact on the planet and create less waste. If quality food produced locally costs a little extra, then we should support that, rather than import, with all the packaging and transport implied from, for example, a country with water shortages, which is effectively exporting a resource they can't afford in the longer term.

Our switch in consumer habits happened naturally, without us really noticing, as we started to produce more and more of our own goods and it's had some surprising fringe benefits. Giving up shampoo and conditioner in favour of rye flour has put an end to my split ends, for example. Not buying any baked goods from the supermarket has eliminated heartburn and bloat. We have never eaten so well in our lives, both in quality and variety terms, and our personal grooming has not suffered by making our own toiletries nor is our house any less clean using our home-made cleaning materials. Not coincidentally, there is now a lot more space in the bathroom cabinet and we've no doubt improved our indoor air quality at the same time.

So what don't we buy any more?

Cleaning products

Home-made vs. shop-bought:
The home-made version lasts longer
despite its smaller size.
No more shop-bought, with all their unnecessary and toxic ingredients, washing powder, washing-up liquid and dishwasher detergent (we now make our own), rinse aid (now vinegar), household cleaner (we now use vinegar, bicarbonate of soda, steam etc.). Instead we buy bulk tubs of bicarbonate of soda (baking soda), soda crystals (washing soda), citric acid and borax substitute.  

Toiletries

Goodbye shampoo and conditioner (we now use rye flour with home grown herbal infusions), face cream, hand cream, sun lotion, lip balm, ointment and salves (we now make all these ourselves), tooth paste (we now make our own tooth powder), deodorant (we now use bicarbonate of soda), moist toilet tissue (now moistened cloths, cut from an old shirt, that are then boil-washed and reused), sanitary towels/tampons (I now use a mooncup, a fantastic product that more women should know about).

Fruit and vegetables

Plenty of veg here all through the year
Other than few top-up onions and garlic cloves we haven't bought any vegetables for three years now. It is surprising what all we can grow here in Scotland and it's no problem to grow enough throughout the year. It might be easier to grow some things in Spain, Italy, Portugal or Australia, but we are blessed with a mild climate here in the UK and shouldn't need many food imports at all. All that's required is a small shift in attitude, from 'What do I fancy?' to 'What is there to eat and cook with?' The seasonal constraints encourage experimentation and creativity in cooking. You can't just follow the same routine all through the year, making the whole enterprise more fun and interesting.

With fruit it's a little more difficult in our climate, but we haven't bought any fruit so far this year. This meant that after the fresh apples were gone, we were down to frozen berries, dried apple rings and fresh rhubarb from March until June when the strawberries kicked in. However, there were plenty of fresh greens to snack on instead, including peas, common fennel and salad leaves, so getting five or ten servings of fruit or veg a day was not an issue.

Jams, jellies and chutneys

A cupboard full of jams and chutneys
These are so easy to make and easily keep for a year without any added E-number preservatives. I try to tailor the quantities I make to what we actually need and don't even bother to label them since we aim to eat all jams, jellies and chutneys within the year, jams and jellies by end of June and chutneys by early August.

Meat and fish from the supermarket

We've made a big switch to more sustainable meat sources, i.e. vermin. Here this means rabbits, pigeons and, the most delicious vermin of them all, roe deer. All of these can be hunted locally and farmers are generally very happy to have someone reduce the number of rabbits and pigeons. Similarly, mackerel is a great eating fish and a freezer compartment can be quickly filled with them and other small scale local catches while they're in season.

Baked goods, bread and flour from the supermarket

Supermarket bread and cakes have never been a favourite, and finding out about the hidden ingredients didn't help. We now buy 20kg sacks of rye and wheat grains and mill our own fresh flour. As a by-product we get nutritious organic bran. The rye and wheat flour is used for baking sourdough bread, and the wheat flour is also used for all other baked goodies - cakes, pancakes, beer batter, pizza bases, dumplings, chapatis etc. The home-milled flour makes everything taste incredible. I was surprised at the difference it made.

Crisps, biscuits, chocolate, ice cream

We now make our own snacks - guaranteed without palm oil, which seems to be popping up everywhere these days from 'traditional' oatcakes and biscuits to chocolate. Homemade ice cream is just the best and a great way to use fruit from the garden.

Herbal tea bags

All herbs are brewed fresh from the garden where we have a large herbal tea plant collection and some of them are dried for winter use. No pesticides here!

Soft drinks and juices

We've never been big drinkers of juice or fizzy drinks, preferring plain water, tea, coffee or alcohol, so this was the easiest choice to make. Juices can be a good way to use up garden vegetables and fruit and we've now started making kvass from our rye sourdough loaf.

What we do still buy

This is why we call it the 'Reasonably Good Life'. Many of the original good-lifers, back in the 60s and 70s, tried to take it all the way to pure and total self-sufficiency. Entirely admirable ambition, of course, but in most cases the degree of discomfort and inconvenience entailed amounted to actual hardship, which resulted in their children, who might have been expected to carry on the revolution, wholeheartedly abandoning the dream for the ease of modern living. Our view is that total self-sufficiency, in our society and the world as it stands, is not realistically possible.

So, what do we still buy from the shops? Mainly dairy products, booze (though less of this than formerly, thanks to our homebrewing activities), grains, oils (with Scottish cold-pressed rapeseed oil now our preferred cooking oil) and vinegars, black tea and coffee, toilet roll. Despite rising prices, our shopping bill is way down - while our quality of life is way up. It's maybe not as convenient, but when did convenience become the be all and end all anyway?

Tuesday, 4 July 2017

Brewing Kvass

Cheers!
Kvass is an ancient folk beer from Eastern European and Russian parts. It's what used to be called a 'small beer' - very low in alcohol (in the region of 0.5 to 2% abv) and generally consumed young and fresh.

There are several characteristics that distinguish kvass from current mainstream beers:

  • The fermenting organisms. Like sourdough and kimchi, kvass is based on lactofermentation, with a mix of lactobacilli and wild yeasts doing the business, in contrast to the pure brewer's yeast strains typically used in beer brewing.
  • The ingredients. Kvass is made from sourdough rye bread, a sugar source, and water.
  • The time it takes to make it. Kvass goes from combining ingredients to drinking in about 4 days.
  • How easy it is to make. Even if you have no homebrewing experience or special equipment, kvass can be made using gear that most everyone has in their kitchen already.

The drink itself is a refreshing and nutritious brew, packed with vitamins, probiotics and gut-friendly lactobacilli. It has a pleasant 'tang', due to the lactic acid content, just verging on sourness. Those are its general properties. The specifics are highly variable and offer a rich field for experimentation.

  • The sugar source can be anything from treacle/molasses, through malt extract or honey, to brown or even ordinary table sugar. The resulting brew flavour is quite different in each case.
  • Then there's a whole universe of possible additives, just for the flavour. Fruit, berries, herbs - apparently one's imagination is the only limitation.

If you bake with sourdough, then you've already got everything you need to brew kvass. Even if you haven't got a sourdough starter in the house (and seriously, you need to remedy this as soon as possible), you can make do with using bakers yeast, since it is generally contaminated with lactobacilli which, in this case, is a good thing.

Now, on to the basic method:
Rye cubed.
  • Take 450g (1lb) of rye bread (ideally homemade sourdough). If it's stale, so much the better! Cut it into sugar cube-sized pieces, spread them out on a baking sheet and pop them in a warm oven (not hot enough to bake bread) until they're completely dried out, but not so long that they burn.
  • Next, place the dried bread cubes into either a large pot, or food-grade plastic bucket, and pour 5 litres (just over a gallon) of boiling water over them. Any fruit or herbs that you wish to add can be popped in at this point. Cover and leave to soak for as long as it takes to drop to around 30°C (86°F).
  • From this point on, use good sanitary technique - make sure that all equipment is well cleaned.
  • Strain the liquid out, through a muslin cloth or a fine sieve, and into your brew pot, bucket or demijohn - whatever you want to do the fermentation in.
  • Add 300g (about 1.5 cups) of your chosen sugar source.
  • Add 100g of reasonably fresh sourdough starter culture.
  • Give it all a good mix together and leave, covered with a towel or under a fermentation lock - depending on what equipment you have available - for a day. After this time you should see a foamy surface layer, indicating that you have a lively fermentation going on.
  • Now bottle it - siphon or pour through a funnel, leaving the sediment behind, keeping a decent air space at the top of the bottle. Tightly cap the bottles, and leave them somewhere cool for a day to finish fermenting. Plastic bottles (recycled fizzy water or other soft drink bottles) are a good choice, since you can easily tell if they're becoming overly pressurised. This is 'bottle conditioning': the fermentation continues inside the sealed bottle and builds up pressure, naturally carbonating your beverage, giving it a wee bit of fizz. If the bottles start to balloon out, just loosen the cap slightly to depressurise.
  • Now refrigerate, leave for a further day or two, and then pour and enjoy!
Apparently, kvass will keep for at least a month in the fridge, but good luck resisting the temptation to polish it off long before then!

A healthy and vigorous fermentation.
This is a cloudy brew, full of goodness. You'll find some sediment at the bottom of your bottles - don't try to avoid it, it's just a collection of beneficial microorganisms that your gut will love.

In our first kvass brew, we used a mix of treacle (molasses) and malt extract syrup as the sugar source, and no other flavourings. The treacle imparted a distinct licorice flavour to the brew, which I liked, but which didn't appeal to the missus. No more treacle! But still, it was good enough to convince us that kvass brewing was an avenue worth pursuing further.

Ideal for refuelling after hard labour in the garden.
Second time around, we used a mixture of malt extract syrup and honey, and added some sprigs of lemon verbena, fresh from the garden, to the soaking bread. This turned out an altogether much classier brew, with subtle notes of honey and a beautiful lemony zing.

Kvass is an amazing discovery for us. A lightly fizzy beverage, without loads of sugar or other rubbish ingredients, and with high nutritional value and gut-friendly microorganisms. We're definitely looking forward to many more experimental iterations and exploring where kvass will take us.