Showing posts with label Homesteading. Show all posts

Wednesday, 12 December 2018

Why are we doing this?

Seasonal salad in December
We're often asked why we have chosen to live the way we live. Occasionally followed by: You're not ill, are you? Or: You have to admit it's kind of weird. We're both well educated and could be working highly paid jobs somewhere, living a 'normal' life.

We don't think it's weird at all. To our way of thinking, it's one of the few sensible things to do in this Anthropocene age: growing food, creating wildlife habitat, reducing consumption and waste. While it seems clear that we need to change our economic model globally - give up the unsustainable economic growth model and embrace a circular, localised economy - and change our diet to local, seasonal, organically grown food, we want to find out what that actually means and whether that is realistically possible. Rather than blocking streets in London, we want to find solutions that could be scaled up. We want to know the answers to questions like:

Food
Our store cupboard 

  1. What can we grow organically where we live?
  2. How does that change throughout the seasons?
  3. What kind of plant-based protein can we grow?
  4. What kind of seed for oil pressing can we grow?
  5. Is it possible to have a balanced, healthy and varied diet on only locally grown food?
  6. How do we save seed from (or otherwise propagate) the plants we like to eat?
  7. How do we best preserve the food that we grow?
  8. How do we feed livestock and pets in a sustainable way?

The answers so far:

  1. We can grow far more than we thought possible, an incredible diversity. Every year the list of what we grow grows longer. If you think you can only grow neeps, tatties and kale in Scotland, think again.
  2. While in the summer we can grow some Mediterranean crops like tomatoes, chillies and cucumbers under cover, our maritime climate also allows us to grow lots of leafy salad crops through the mild winter, both under cover and out in the open. Some crops are available most of the year (like oriental greens, mustard, radish and lettuce) or can be stored to last most of the year (like potatoes, beetroot, broad beans and onions), while some have a short season (most of the fruit, though they can also be frozen or dried for use during the winter).
  3. Protein crops: Not very many. Beans, peas and quinoa, that's pretty much it.
  4. Oil seed: Still working on that one. So far only oil pumpkins have produced a reasonable yield, but we're trying linseed and camelina this year.
  5. Varied diet: Oh yes! We have never eaten so well and had such a diverse diet as now.
  6. Seed saving: We're on a major seed saving drive. It's a lot of knowledge and skill to propagate plants and save seed, but luckily there are good books out there. Let's hang on to these important skills!
  7. Storing food: Basically preserve your produce in ways that you like to eat. In our case, this involves a lot of fermentation (kimchi), drying (fruit leathers, herbs for the winter), pickling, making jams/jellies/chutneys/relishes, lots of ice cream and, of course, booze.
  8. Fodder: We're trying to cut out soy and other imported food stuffs from our animals' food. This involves sprouting/fermenting grains for the chickens and cooking up crops like oil pumpkin and tiny tubers (Jerusalem artichokes, potatoes) for them. For the cats, this means feeding some fresh meat (usually rabbit, venison or pheasant roadkill) and sourcing soy-free British-made pet food.

Cleaning and waste
Soapwort dish soap

  1. What alternatives are there to chemical cleaners, soaps and toiletries?
  2. Can we make our own cleaning agents, soaps and toiletries from plants we grow in the garden?
  3. Can we hot compost human manure and safely use the resulting compost?
  4. Is there anything organic we can't compost?
  5. How can we cut out single use plastic from our lives?
  6. How can we reuse materials we already have?

The answers so far:

  1. Cleaning agents: There are some. We are now mainly using vinegar and bicarbonate for cleaning the bathroom and floors and soapwort liquid for doing the dishes. Soapwort is a plant we can easily grow lots of and we're planning to use it for washing our clothes and our bodies in the near future. That's natural saponin. For our hair, we've been using rye flour as shampoo for several years now and it's better than any shampoo we've ever used, especially mixed in herbal infusions of garden herbs and flowers. We make a tooth powder of salt, betonite clay and dried powdered fennel. The remainder of our toiletries are homemade products: lip balm, skin lotion/ointment and sun screen. All use bees wax and herb-infused oils. For our baths, we run the water through a mesh bag containing herbs and flowers.
  2. Home grown herbals: We use soapwort, calendula, comfrey, broad-leaf plantain, rosemary, lavender, rose petals, mint, lemon balm, chamomile etc.
  3. Humanure composting: It works well. Why would we contaminate our waters rather than using our manure as a resource?
  4. Non-compostibles: Not much, if we use thermophilic composting.
  5. Plastic reduction: Probably the easiest way is not to buy so much and to avoid shopping at supermarkets. Small businesses and shops are usually miles ahead when it comes to biodegradable packaging or reuse of containers. Growing and making things cuts out the most, of course, but you can also buy from farm shops or have a veggie box delivered to avoid packaging.
  6. Reuse: We're always working with reclaimed materials, especially wood and fabrics, but also things like metal fittings and glassware.  Rags from old T-shirts make great wet wipes, for example (boil wash after use). It's all about being flexible and thinking first about the alternative designs for a job rather than going with the same old.

Our PV array

Energy

  1. Is it possible in a domestic setting to live on solar panels and battery in Scotland?
  2. What habits do we need to change to live within the energy we generate?
  3. How can we lower our energy use to the bare minimum while still keeping warm, having hot water and food and light during the hours of darkness?

The answers so far:

  1. Solar energy: Yes, if you have an alternative source of heating for the winter, like a wood burner. But only if you really really reduce your electricity usage.
  2. Habits changed: Lots, especially when, how often and how we shower and when we run our appliances.
  3. Energy saving: Lots of ways. Using wash cloths or bucket and scoop instead of having a shower or bath, for example. Not washing clothes (other than underwear and socks) after one use only. Switching to all LED lights and A+++ appliances. Sweeping rather than hoovering. Using hand tools rather than power tools. Putting on extra layers rather than heating the whole house. Keeping the bedrooms at a lower temperature. And so on.

Fauna and flora
Wildflower bed

  1. What habitat can we create?
  2. What plants should we plant specifically to help local wildlife?
  3. If we plant hedges, trees and wild flowers and make wildlife ponds, will animal numbers and diversity increase?

The answers so far:

  1. Let's give over some of our land to wildlife habitat. This can take many forms: wildlife-friendly hedges and trees (like willows), wildlife ponds, wildflower meadows, 'untidy' areas with lots of herbs and flowers.
  2. Selecting plants: Do some research to see which plants your local butterflies require for food, for example. Planting early- and late-flowering plants is a good policy, letting things go to seed also provides a lot of food for wildlife.
  3. If we build it, will they come? Yes, they will! Our garden is buzzing, chirping and ribbeting. After dark in the summer it's hard not to step on a frog or toad. Newts, frogs, toads, dragonflies and damselflies have moved into our pond since we re-established it. Bird numbers have risen dramatically since our hedges filled in. Bumblebees, hoverflies, solitary bees, butterflies and moths are enjoying the many herbs and flowers.

All these things are achievable at the level of private individuals. We don't have to wait for governments and industries to get their act together (by which time it'll probably be too late anyway). If enough of us take these simple steps, the benefits will be realised by all.

Tuesday, 10 April 2018

Setting up for self-sufficiency from scratch

Broadforking a large new vegetable bed
Chatting with a friend who's just about to start working a croft has focused my mind on how I would set up our veg garden from scratch if I had to start over again and what I'd consider essential in a veg garden. We've worked these things out over several years and have implemented the suggestions below, but we could set up even quicker, with what we know now.

First of all, I'd identify the sunniest, best drained land by walking the land at diffent times in different conditions, like after heavy rain (be aware that light levels might quite different in winter, but spring to autumn levels are really the most important since that's mainly when you're growing). If it's sheltered as well - super. Otherwise hedge planting has to be top priority - put in a temporary windbreak fabric fence until the hedge is established (about three years). If it's reasonably level ground - even better, but you can work with terracing. It should also have easy access to water for watering (not so crucial in Scotland, but elsewhere it could be). If it's downhill from the house you can easily collect rainwater from your roof to water your veg.


Vegetables and herbs


Last year's squash bed
Raised beds
Part of the large herb garden
This area will eventually be totally
given over to perennial veg
Then I'd make a plan for four large vegetable beds (about 4m x 20m, scaled appropriately if you have less space) for the large crops: potatoes; onions, garlic, leeks and carrots; brassica; and a three sisters bed - courgettes and winter squashes with beans and sweetcorn (if you're lucky enough to live somewhere warm enough where these will grow outdoors - for us it's just squash). This makes it very easy to keep track of crop rotation, which can be a challenge otherwise. To minimise work I'd put down black plastic for a minimum of six months where these beds are going to go. This kills all the grass and weeds underneath and makes preparing the ground a lot easier.

If you think your ground is suitable consider no dig, in which case you can use cardboard as your base layer and top it with compost and organic matter. This uses a lot of compost, however, so think about cost implications. I'd advise trying to dig in several spots first, to see just how stony the ground is and what drainage is like. Much of our ground was very stony and drainage needed to be improved so no dig will have to wait. On the other hand, if your ground is too stony to do anything with, possibly the best way is up: making huegelkultur beds on top. That is, if it's not too windy to go upwards! We ended up making an underground huegel in a particularly wet part of ground.

In addition to the four large beds, I'd have a dozen raised beds for lettuces, salad leaves, beetroot, chard and crops that do better in raised beds such as celeriac. These beds don't have to have permanent structures; they can just be created by mounding up the soil. In this area there also needs to be space for an easy to move pea fence or trellis.

Somewhere near the house, I'd set up a herb garden with lots of perennial herbs and some annuals. This would also incorporate edible flowers, wild flowers and medicinal herbs (often the same plants!).

Next on the agenda would be an area dedicated to perennial vegetables, with some luxury crops such as globe artichokes and asparagus, some great staples such as Daubenton's kale, Good King Henry and a few varieties of perennial onions and some of those tubers that keep on coming like Jerusalem artichokes and oca.

The last of the winter crops and
the first of the spring crops
Then on to a polytunnel for extending the season. In this case, it is critical what the winter light levels are like since you'll be overwintering a lot of crops in it. Choose a very sunny levelish site with easy access to water. Our polytunnel is 20ft by 8ft, which is a great size for the home grower who doesn't want to grow vast quantities for sale but rather wants to keep growing salads and greens throughout the winter and have a wider option of veg to grow in the summer. Of course, it would be no problem to fill a larger tunnel, but it would also mean a lot more watering! A lot of things are better grown outside, such as onions, for example. And you don't have to worry about pests such as aphids as much. A 'cloudy' polytunnel cover is better than a fully transparent one since it lets plenty of light through but doesn't scorch plants in the heat. A south-facing conservatory or potting shed is very useful for pre-growing seedlings in the spring.

Fruit and nuts

When it comes to soft fruit, I'd get all my cuttings from other gardeners if possible, since they are so easy to grow from cuttings, especially currants and gooseberries. The same goes for vigorous rhubarb - a split of a plant that does well in your area is the way to go - and strawberry runners (which will need to replaced every three years to maintain vigour, easily done by taking runners from your plants in the summer after the harvest is done).

The orchard four years on
We have a dedicated soft fruit area, which could be netted over in a fruit cage arrangement (this makes harvesting easier since you can walk in and stand up). However, this hasn't been necessary so far, but it is a consideration in areas with flocks of pigeons especially. I've also made little hedges of berry bushes for most of the large veg beds and along the side of the main vegetable garden. I'd go for a huge variety of fruit, with some more unusual berries such as Siberian honeyberry (blue honeysuckle), Saskatoon berry and Chilean guava thrown into the mix to extend the fruit season. I'd rather err on the side of too many plants; that way, the birds can have some and there should still be enough left for you.

When it comes to fruit trees, I'd again err on the side of too many. We've ended up with eleven apple trees, two pears, two plums, two mirabelles, two mulberries, three cherries and one quince. It's crucial to get the pollination groups right, especially if you're in a remote area with no other fruit trees around! The one thing I would change next time is to make sure to have a couple of apple trees with apples that store really well; usually these are the late-fruiting varieties. We only went by flavour in our selection so none of our apples store particularly well without processing them.

Edible hedging around the veg garden
Other than planting an orchard, I'd also recommend incorporating edible plants into your hedging schemes. For example: crab apples, wild pear, wild plum, rosa rugosa (for rose hips), elder (for berries and blossom), hazel nuts, hawthorn (for berries), blackthorn (for sloes), sea buckthorn (for berries - this is quite a vigorous plant though, which can be invasive in some areas), guelder rose (for bark, anti-cramp medicine), willow (for wands and bark - natural aspirin - and as one of the best wildlife plants in the UK), tilia/linden (for leaves and flowers) and beech (for young leaves).

If I lived in a climate where they'd crop, I'd also plant lots of nut trees such as walnut, cobnuts and sweet chestnut. Now this is a really long-term proposition! Sadly, although they grow well enough here they only rarely produce a usable crop, with the one exception of hazelnuts - but we've yet to harvest a single nut from our 10+-year-old trees. In the meantime, we're going have a go at growing tiger nuts instead.

Following a programme like this will give a high degree of food self-sufficiency in just a few years, without needing to sacrifice interest and variety in the diet.


Saturday, 3 March 2018

Preparing for bad weather

Wintry conditions
Reading today that people running low on supplies, after only three days of bad weather, had panic emptied supermarket shelves made me realise how woefully unprepared many are for any interruption of normal service and how little respect they have for adverse weather. Time to highlight a few lessons learnt at sea!

Even on our 29-foot boat (very small, by offshore standards) we always had enough stores aboard for at least one month; in the cottage we generally have enough for three months. But food isn't the whole story, you should also be prepared for power cuts, gas shortage or disrupted water supplies and be able to stay warm, keep hydrated and prepare the food you have in the house.

Useful gear to have

Rainwater barrel: a good source of water,
once you've broken through the ice!
Alternative cooking set-up: This could be on a wood burner (works well with a pressure cooker, for example), a camping stove (make sure you have plenty of fuel for it), a Honey stove, Kelly Kettle or even the barbecue (if you have a sheltered place outside to use it).
Alternative lighting: Solar lanterns, candles, paraffin lamps (and paraffin to run them)
For keeping warm: Hot water bottles, thermos flasks, electric blankets, woollen blankets, long johns, woollen jumpers, onesies. Unless you live in a super well-insulated house, heat yourself rather than your rooms! Keep moving about at regular intervals.
For water storage: Plastic canisters with pouring spouts, collapsible water tanks, rainwater collection system from your roof (great additional source of water for washing and doing the dishes).

Bad weather doesn't come out of nowhere. It's usually forecast several days in advance. Time enough to make preparations. As we learnt at sea, do things while conditions are good, don't wait until it's suddenly too late.

What to do ahead of time
Paraffin lamp in the water pump housing

  • Get plenty of wood in (or whatever your alternative fuel is).
  • Fill up water stores with tap water, no need to buy bottled water. Fill as many containers as you can, enough for a few days at least. If you haven't got access to water outside (like a stream or rainwater barrels), fill your bathtub with water for washing and the dishes.
  • Look out your alternative lighting and put it somewhere you can find it in the dark.
  • Top up any food supplies that are low.
  • Cook a big pot of soup.
  • Generally batten down the hatches, e.g. make sure nothing loose is left lying around outside, protect vulnerable plants, harvest available veg etc. One example lesson we learnt during the 'Beast from the East' is: insulate or heat the water pump housing when freezing temperatures are forecast!
  • Cancel or rearrange any appointments scheduled during the time of the storm.

Food staples

There's always a silver lining!
We always buy dry goods in bulk (10kg to 25kg), but if you have less space, even smaller packs of 3-5kg will last a long time. Don't rely too much on stuff in your freezer since you want to avoid opening your freezer or fridge during a power cut. It'll still be there if needed.
Stock up on:

  • Grains and cereals such as porridge oats/oatmeal, wheat, rye, pearl barley, rice, quinoa
  • Dried legumes such as beans, split peas, lentils and chickpeas (apart from split lentils, you'll need to soak these for at least eight hours, but then you can make soups, stews, curries, sandwich spreads etc. with them)
  • Tea, coffee, sugar, salt, milk powder, herbs and spices, dried fruit and nuts
  • Baking supplies: baking soda/powder, yeast or sourdough, flour
  • Oil and vinegar
  • Tinned food: tomatoes, mushrooms, fish, any other vegetables that you're particularly fond of
  • Alcohol (especially medicinal spirits!)
  • Hard cheeses (should keep for a few months)
  • Potatoes and onions
  • Eggs (best to keep hens, if you can!)

Useful stuff to have in the freezer: meat, fish, berries, butter, bread, leftover meals.


Above all, be flexible in what you eat, it may differ from your usual fare. Cooking and baking are highly desirable life skills, essential in certain situations, and everybody ought to know how to prepare basic foodstuffs, like baking a loaf of bread and making soup from scratch.

One thing that is often forgotten about is to make sure to have some entertainment at the ready that doesn't rely on power: card games, board games, physical books, that sort of thing. Once all is prepared and snug, there is no reason not to enjoy the enforced period of rest. As long as your home itself is intact, you can sit tight as the absurdly fragile structure of civilisation crumbles outside and wait in reasonable comfort for things to return to normal.


Wednesday, 6 December 2017

Make an eco pot scourer

The final product
Ever on the lookout for alternatives to throwaway plastic landfill items, I recently learnt that in the crofts and country kitchens of old the pot scrubbing brushes were made from heather. It's an abundantly available resource, growing in profusion on the moors round about us and though I don't imagine I'll be thatching the roof with it or making rope from it, as folks used to do, I figured I could definitely make heather pot scourers.

A web search turned up a museum photo of an old example, but nowhere could I find a write up on actually making one. Still, having seen what the finished product should look like, I was prepared to give it a go.

Tools and materials needed


  • Sharp knife
  • Marline or heavy-duty twine
  • Chopping board
  • Snips
  • Bunch of heather 
  • Two sets of pliers
  • A second pair of hands


Step by step


1 Harvest

Step one, obviously, was to go harvest some heather. I selected reasonably straight branches, with a good spread of finer twigs at the top end, and cut lengths of approximately 8 inches.

2 Thrash

Next, I thrashed the collected bundle against a stone wall to dislodge the old flowers, leafy greens and any other loose material, before taking it all indoors to work on.

Materials and tools needed for step 3

3 Trim and tie

After trimming and shaping with a sharp knife, I collected the bundle together and bunched it into more or less its final form. Here it's tremendously helpful to have a helper to hand, first to hold the bunch while you tie on the first knot of sturdy twine and then to tug on the other end of the knot to get it cinched in tight.

The first constrictor knot

The knot I would recommend is the constrictor. If no other good comes of this than more people learning the constrictor knot, my effort will be repaid. It's easy to tie and can be tightened as securely as a jubilee clip. See the tutorial for tying this super useful knot here.

Ready for a tug of war (Step 5)

5 Tighten knots

Have a pair of pliers each for yourself and your assistant to haul in tight on the ends. Once it's tight, finish each end with an overhand knot close in to the constrictor and trim off the excess. Add a second and a third band to the scrubber handle, trim the heather to the desired finish at either end and go do the washing-up! This scourer is also very useful for brushing up crumbs on the table.

That's all that's needed

Tuesday, 10 October 2017

Towards zero waste

Embrace the reused glass jar
It's unlikely that zero waste is possible for humans, but we can achieve zero food waste quite easily (especially if we don't have children!) and we can also aim to reuse as much as possible and create mainly biodegradable waste.

Here are a few of the things we do, and recommend to all thinking people, to reduce our resource requirements.

Take consumer responsibility seriously

Give your business to businesses that use little and biodegradable packaging such as cardboard or compostable vegware packaging. Of course, it can be hard to tell from the outside how much packaging is used, for example individually plastic-wrapped tea bags, but you're only going to buy that brand once. And it is impossible to know what kind of packaging is used when ordering online, but again you can reserve repeat custom for ethical companies.

Similarly, if you are running a business think carefully about the amount of packaging and the material to use.

Reuse if you can

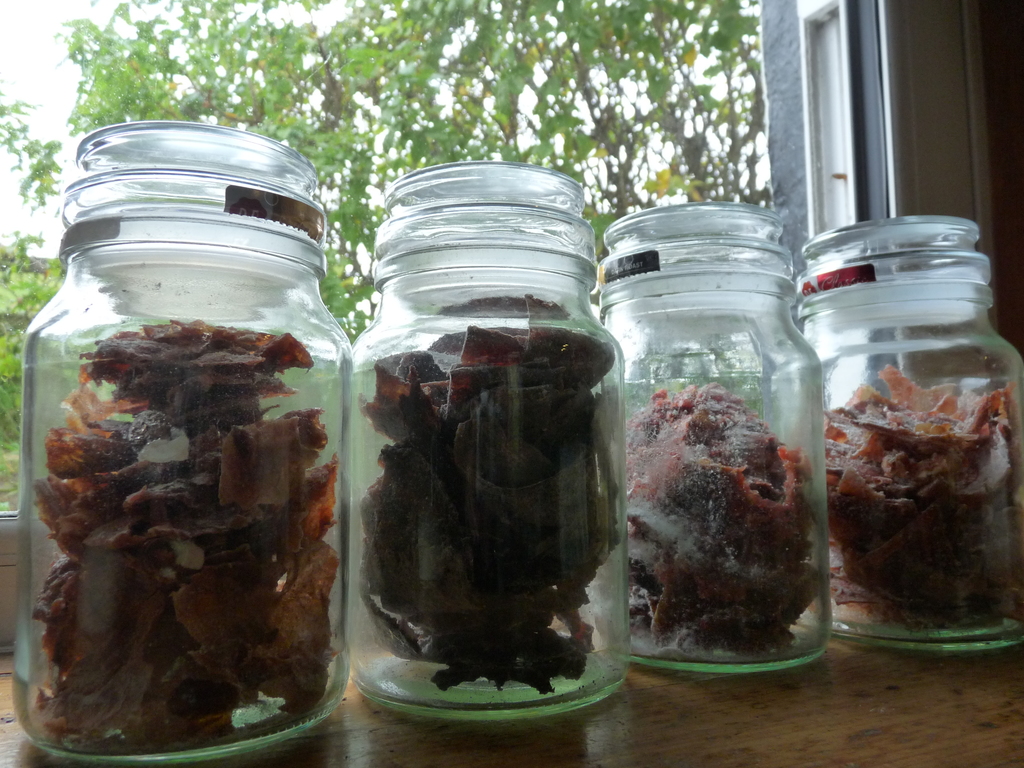
Fruit leathers in former instant coffee jars
Zero waste kitchen storage looks pretty too
Glass recycling is all very well and does save some energy compared with using virgin materials, but it still uses a lot more energy than simply reusing glass containers, either in the home or through a bottle deposit scheme. So basically never throw out another glass jar again! The low-waste way of life does require a lot of glass jars and bottles for storage and, since we are not buying anything in jars any more, we've got to the stage where we're asking all of our guests to bring spare glass jars. Keeping your dry goods, herbs, spices and snacks in glass jars also looks good in the kitchen and is hygienic, keeping stored food safe from pests.

A good way to reuse cardboard, other than using it as fire-lighting material, is as mulch in the garden, for example as part of a no-dig 'lasagna' bed or around newly planted fruit trees, bushes or hedge plants or simply as weed suppression in a new area you plan to cultivate.

As for plastic - we so rarely have plastic bottles that we had to raid our neighbour's recycling when we wanted some for storing our kvass.

Cut out single-use plastic

There is no need for single-use plastic items. Plastic straws are not one of life's necessities. If you want a takeaway coffee, take your own mug. And there are affordable alternatives to plastic plates, cups and cutlery for picnics, barbecues or parties: palm leaf compostable tableware, wooden cutlery, kraft paper cups and plates.

Use your own containers

Always have a canvas or durable plastic bag with you, in case of unanticipated purchases. Take your own bags and containers when you go shopping. If you're lucky enough to live in a country where you can buy milk direct from the farmer, such as England or Germany, you can even refill your own milk churns. Buy dry goods from bulk shops where you can refill your own containers - or buy them in bulk online when they usually come in a 25kg paper bag, which can then be reused as a bin bag, as mulch or be burnt. Grown your own veg or buy fresh produce loose and transport in your own bags.

Make your own toiletries and cleaning materials


Homemade lip balm in reusable container
Cut out all those plastic bottles in the bathroom and kitchen by making your own toiletries. Waste reduction strategies include:
  • Using bars of soap instead of shower gels and liquid soap
  • Using shampoo bars or rye flour instead of shampoo
  • Making your own washing-up liquid and reusing old containers to store it
  • Using vinegar or steam to clean
  • Making your own lotions and potions and reusing jars to store them
  • Reducing the amount of make-up you wear or cutting it out altogether
  • For women, using a moon cup instead of sanitary towels or tampons
  • Using moistened old shirt rags instead of  wet wipes/moist toilet tissue and boil-washing them before reusing - an ideal way of using up old clothes, once they're past the 'work clothes' stage.

Eat up

Regularly check what needs to be eaten
Healthy snacks
  • Regularly check what’s in your fridge and store cupboards and which items need to be used up.
  • Eat up your leftovers. Turning them into a different dish the next day helps with this.
  • At least once a year, eat up everything in your store cupboards and freezer, clear them right out and start afresh. This will avoid items lurking at the back of the cupboard for years. You will have the peace of mind that everything in there is at most one year old. We don't even label our preserves because we eat them all within the year. If you're still eating five-year-old preserves you are making too many - take a year off from them and use your produce in a different way.
  • Change what you snack. For example, rather than buying a packet of crisps, make your own crisps or have an easy-to-make healthy homemade snack such as cold leftover potatoes with salt and pepper (the original potato snack), a bowl of kimchi, a hard-boiled egg, a slice of homemade bread with herb butter.
  • Impress on your children the need to eat up - there are helpful books around on the subject. Not offering too many alternatives seems to work.

Children, at least, can be reasoned with on the subject of food waste. Our only food waste is usually cat food. This is where livestock, like chickens or pigs, comes in handy. We basically treat our chickens as if they were pigs; they eat almost anything and love cat food.

Drink sensibly

  • Drink tap water rather than bottled mineral water. Filter it if need be.
  • Eat a juicy piece of fruit or make your own juices/smoothies/cordials rather than have packaged juice or sugary soft drinks.
  • Buy milk direct from the farm if you can.
  • Grow your own tea herbs. A few containers of tea herbs such as mint, lemon balm, camomile and sage don't take up a lot of space. They can even be grown on a windowsill in a flat or on a balcony.

Compost

  • Compost your food and garden waste.
  • Bury meat bones and fish heads in the garden to enrich the soil.

Buy second-hand

Save things from the landfill!
  • Preloved furniture is often a fraction of the price of new furniture and, depending on age, can be higher quality wood, with better workmanship and any VOCs (volatile organic chemicals) will be long gone. Charity shops, antiques barns, auctions, house clearances, furniture projects are all good sources for tables, chairs, sofas, chests of drawers, wardrobes and bed frames.
  • Charity shops are a great source of clothing too, especially for bargains on winter coats and party dresses, and you can assemble a fun mix-and-match china crockery selection and glassware for your kitchen.
  • There are lots of second-hand books in excellent condition around (I say this even though I am an author myself and, of course, wouldn't earn any money from second-hand sales of my own book). Ditto for second-hand technology such as laptops and mobile phones.


One by one, these are pretty simple changes to make, but each step by each individual takes us a little closer to the goal. Some require a little discipline but nothing too onerous. And all of the above save us money, sometimes serious money. The most important first step? Just thinking about what we consume and questioning whether we really need to consume it.


Sunday, 4 June 2017

May round-up

Blossom, blossom, everywhere
It has been a very warm and dry month of May here. Three weeks without rain and lots of days with temperatures around 20°C! Our rainwater-collecting system (six barrels, each 200 L capacity, that are filled by run-off from our roof) which we use for watering the vegetable garden was nearly empty at the end of the dry spell. With all the new seedlings coming up (direct sowings of carrot, beetroot, kale, chard, New Zealand spinach, calabrese, red, winter and Savoy cabbage, purple-sprouting broccoli, kohlrabi, lettuce, turnips, radishes, scorzonera, edible flowers and herbs) and being planted out (dwarf and climbing French beans, summer and winter squashes, courgettes, celeriac, amaranth, sunflowers), there was a lot of watering to be done: my least favourite job in the garden.

Squash seedlings
Empty beds
Path from the top paddock to the middle paddock
Salad with beetroot and celeriac stalks
So hot we had to shade the greenhouse
The first job of the month was to get the squashes going. Sowing them on 1 May means that they are perfect for planting out four weeks later, after the last frost date and when it's reliably warm enough for them. Because I'm seed swapping with a squash aficionado, I ended up with 22 different varieties this time. Of course, I had to pop in two or three seeds of each, to be sure to get at least one plant each. The germination rate was excellent and suddenly we had 51 squash plants needing a home. Luckily, the Huegelkultur bed was nearing completion. It made a very handy depository for the mountain of used-up brassica plants left over from our winter crops.

Once all the purple-sprouting broccoli, kale and most of the chard had been removed from the veg garden, the beds were looking rather empty. The emptiest it's been all year. After a quick tilling and cultivating session with the new Mantis, the beds were ready for direct sowing and to receive the latest seedlings from the conservatory. The asparagus seeds germinated very well this time, after soaking them for two days, and it looks like we've got ourselves just over a full bed of asparagus plants. I already had a half dozen three-year-old Martha Washington plants and added the newcomers (Argenteuil and Jersey Knight) to the same bed. Now wait four years.

The grass has been growing like crazy and for the past week we've been playing catch-up to get things under control again. All the hedges need weeding and mulched around as do the fruit bushes, fruit trees and potatoes. So far we've completed the top and middle paddocks, with only the large bottom paddock left to do. However, since we've removed the fence between the middle paddock and the top paddock, maybe they classify as a single paddock now! The fence was very well made, but Jim managed to extract the six-foot posts (half underground) with the aid of a 2-tonne hydraulic jack. The space has now a much more open feel and view, and we've put down a more secure pathway instead of the old chicken ladder.

We've been eating very well, with the polytunnel virtually eliminating the 'hungry gap'. Already this month, we've had beetroot, broad beans, pak choi and courgettes from the polytunnel, colourful salads most days and heaps of globe artichokes. And wild rocket is a new weed in our garden - the kind of weed we like!

The chicks at one month
The chicks are growing fast. At the age of three weeks, they got a slight shock - it rained for the first time in their lives! Can't be many Scottish chickens that lucky. Out of the five, three are hens and two cockerels. Luckily three more hens was exactly what we wanted. We'll keep our flock black-and-white with two more black hens and one white one. The cockerels will be for the pot, unless one of them is needed to replace Feathers who's been spending a lot of time on the therapist's couch recently...

Monday, 15 May 2017

Digging a Hügel

Couldn't have known what a big job it would be.
The single largest task we had planned for this spring was creating a large (about 12 x 4 metres, or 40 x 15 feet) new vegetable bed down in the bottom paddock.

We're nearing the end of our rolling programme of covering large areas with black plastic each year, for digging new beds the following year. The ground down there is quite heavy with clay, borderline boggy. The original intention was that it should be this year's potato bed, but when I started digging it, back in February or March, I soon concluded that it was far too wet and stony to be ready in time for planting potatoes! We found a better spot for the tatties and put this one on the back-burner for a little longer.

Happily, at just this time, we heard about Hügelkultur (literally mound- or hill-culture). This is a land management technique long practised in parts of Germany and Eastern Europe, in which marginal land is made cultivable by creating mounds of wood, woody waste from around the garden, plant and grass cuttings: basically whatever organic material is handy, with compost and soil over all. The result is a bed with a decaying core of organic matter that acts as a moisture store, while gradually breaking down, enriching and contributing to the soil.

Typically, the material is simply piled up on the surface of the ground, over an area of about one by two metres, to a maximum height of approximately one metre. In our case, the area we wanted to cultivate is considerably larger (of course, we could have just created a series of small mounds), and is also very windswept. Although we have planted hedges to break the wind, it'll be a few years yet before the shelter is really good and in the meantime we can't get into vertical gardening.

By this stage I was starting to realise the scale of it.
We decided to modify the method to suit our needs, inverting our Hügel and embedding it in the ground, so I started by digging a large trench. The first six to eight inches weren't too bad, coming up with the spade as hefty soil blocks, with some stones scattered throughout.

Couldn't have done it without the fishbox soil sifter.
Then came the 'stone zone'. A layer of another six to eight inches so packed with stones as to be impenetrable to spade or fork. I suppose at one time, 9000 or so years ago, this was the bed of a glacial meltwater runoff.

We had just invested in a Mantis tiller, which proved to be the very tool for the job. With that, I was able to gouge out the stone zone layer, into piles of earth and stone the we could shake through our homemade fishbox soil sifter. The soil was thus kept to go back on top and the stone added to our ever-increasing mound of rubble in the bottom corner of the garden.

Probably couldn't have done it without beer either.
Once underneath the stone zone, the ground was again penetrable to the spade, allowing me to dig out the deepest, central portion of the trench, down another 12 inches or so.

That's where the trench met the level of the ground water, and soon there was water pooling in the bottom of the trench, even though we were weeks into an unusually dry spell of weather. This hopefully means that the new bed won't ever need watering.

Now it was time to start filling it all back up again. We started out by sacrificing a couple of large sitka spruce firewood logs to the cause, providing the substantial, slowest-decaying core.

Step 1. Logs

Next came a layer of scorched gorse bush remains, which our neighbour had burnt off a nearby hillside the year before. Still woody matter, but much smaller pieces than the core logs.

Step 2. Brush
On top of that, we happened to have a very large pile of winter brassica ready to be cleared from the rest of the veg garden.

Spent winter brassicas
So, in it went. This will break down much more rapidly.

Step 3. Garden waste
We also chucked in some rotted manure at this point, for good measure.

Step 4. Manure
As the final, swiftest decaying layer, we spread in a load of grass cuttings.

Step 5. Grass
And then it was time to Mantis (yes, that is now a verb here) the soil back over top of all.

Step 6. Tilling and covering
The soil is, of course, still heavy clay. Very sticky when wet and easily compacted. So we added a bale of wood shavings (animal bedding type), to lighten things up a bit.

Step 7. Wood shavings to be mixed in

Soon it will be time to add squash seedlings. Hope they're going to like the new bed created especially for them!

Just add seedlings


Sunday, 30 April 2017

April round-up

Typical April harvest
April has been a super busy month. It started with another major sowing session indoors (cucumbers, tomatillos, asparagus, quinoa, amaranth, broccoli, basil, coriander, celeriac, cantaloupe melons), followed by sowing the maincrop potatoes (Setanta, Sarpo Axona and Blue Danube) outside in a new bed that required major stone removal - in fact, it now has a little stone wall running alongside it. We also planted out the peas sown in pieces of guttering, a method that worked extremely well.

One of the three black chicks
Unfortunately, we had an egg-eating incident - chicken caught in flagrante, pulling an egg from underneath another hen and chomping into it - so we had to soup our favourite hen. This prompted us to get the incubator on. Last round of incubating our own eggs. Next time we'll get some hatching eggs in from a local farm, probably Welsummers and Copper Marans, to mix up our gene pool again. Out of 10 eggs we got seven chicks, hatched on 25 and 26 April. Unfortunately, one chick died in the first night and another one had straddle legs, which we taped in place with a sticking plaster tether, but the little one did in the second night. At least the other five are doing very well.

Tomatoes in the polytunnel
Then it was warm enough to plant out the tomatoes into the polytunnel and greenhouse. Since our area is bad for potato blight (which also unfortunately affects their tomato cousins), we grow our tomatoes in containers and mainly inside: 16 in the polytunnel, 8 in the greenhouse and 6 in the conservatory. We'll try a couple of the Magic Mountain variety outside since it's been billed as very blight-resistant. We put a little bit of manure in the bottom of every tomato pot (and, later, we'll do the same for chillies, peppers, cucumbers and melons).

Brassica set-up

We also set up a brassica fortress outside. Each of our dozen kale, romanesco, cauliflower, Brussels sprouts and red/Savoy cabbage seedlings has been planted inside a bottomless pot that has a ring of copper tape running around it. The pot to protect against the occasionally fierce winds here and the copper tape to keep slugs and snails at bay. Then the whole lot is netted over to protect the seedlings from birds and cabbage white butterflies. There will still be some losses, but at least this gives them a better chance.

The herbal tea plants are all up and we've even had some first flush green tea from our Camellia sinensis bushes. Though mainly we drink pots of lemon balm tea, various mint teas (apple, Swiss, Moroccan, Eau de Cologne and mixtures thereof) and sage.

The big new bed
The second large new bed in the bottom paddock has turned out to be too boggy to be used as a straight-up bed so we've decided to turn it into a Hügelkultur bed. This means that Jim will dig a trench which we'll fill with all kinds of organic materials and then make a little mound over it afterwards. Not too high though because of the wind! We're definitely horizontal gardeners here, anything that sticks out over the hedge will be scorched.

Overwintering pea in the greenhouse
The edible and medicinal flower bed has been dug at last and sown with edible poppies, two types of calendula, two types of cornflower, coriander, dill, cumin, chives, camomile and salad burnet. Just the amaranth and sunflowers to add next month. The old ash pit next to our front door has been sown with a profusion of wild flower seeds (plus some 5 for £1 Lidl flower seeds). And Jim has mowed the entire garden for the first time this season! All the fruit trees, some fruit bushes and some hedges have been mulched with the grass clippings.

Femspot cucumber in the conservatory
This year we're trying an all-female cucumber variety for the first time. Very impressed so far with the vigour of these Femspot cucumbers. They've already demanded potting up. We'll have to keep them separate from our other cucumber variety, Crystal Lemon, so the Femspots will be in the conservatory and greenhouse and the Crystal Lemons in the polytunnel. It'll be nice not to have to help along with pollination on the Femspot plants! On the Crystal Lemon cucumbers and the cantaloupe melons, I will be using cotton buds to hand-pollinate the female flowers from the male flowers.

First radish of the season
We've also started some direct sowing outside: carrots, scorzonera, lettuce, chard, New Zealand spinach, turnips, radishes, beetroot. Most of the direct sowing will be happening in May though. I've also continued experimenting with crops in the polytunnel. Already the first carrot seedlings are up and the beetroots are way ahead of the outdoor ones. I've also popped in one courgette, for extra early courgettes, and some pak choi. The tunnel's filling up fast!

Homemade pasta, on the homemade drying rack
On the food preparation and preservation side, we've made a batch of purple-sprouting broccoli & Daubenton's kale kimchi, some rhubarb ice cream and our first ever pasta - from home-milled flour with our own eggs. Definitely will be making our own pasta from now on!